guides
How to Season a New Smoker: Step-by-Step Guide
Season your new smoker right before the first cook. Step-by-step instructions for offset, pellet, kamado, kettle, and electric smokers.
 Cole Whitaker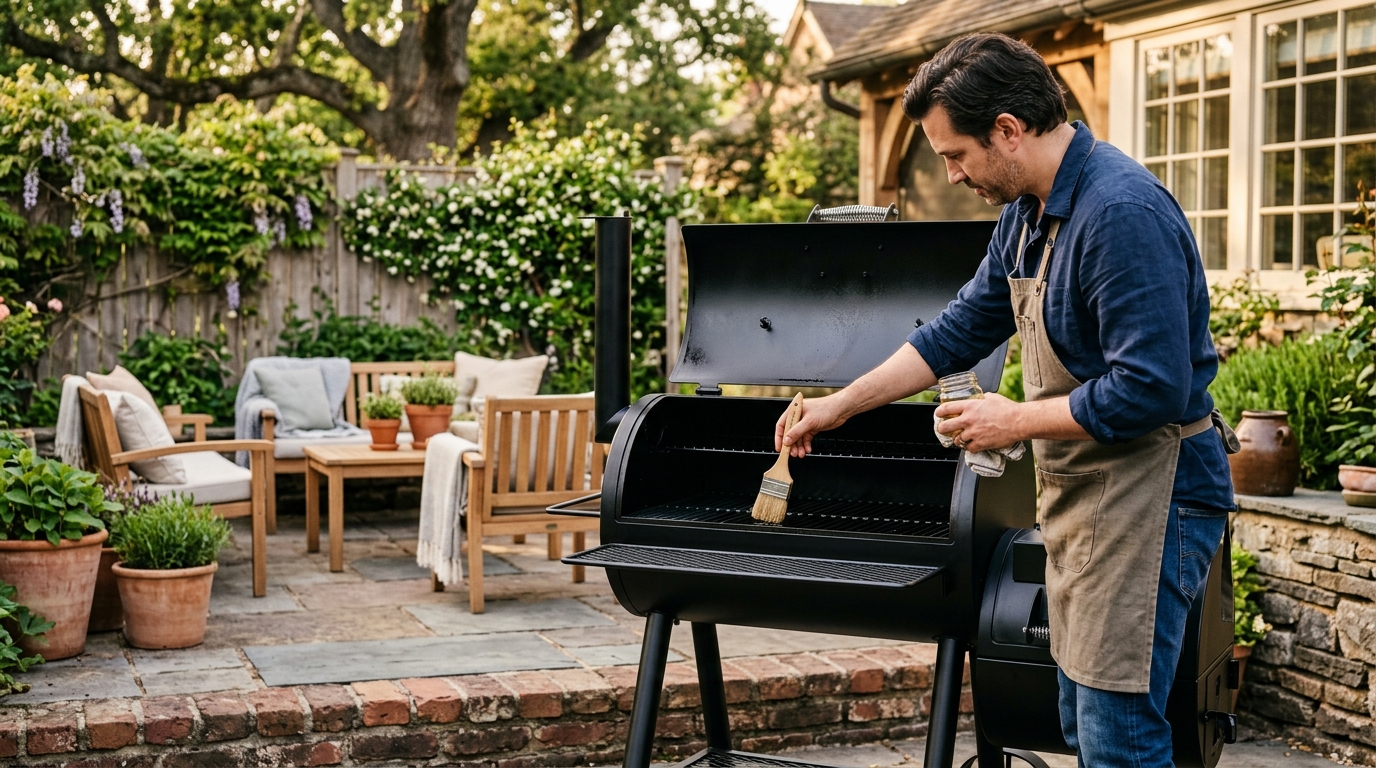
Seasoning a new smoker means coating the interior with high-smoke-point oil and running it empty at 275–325°F for two to three hours before your first cook. This burns off factory residues, polymerizes the oil into a rust-resistant protective layer, and eliminates any chemical flavors from manufacturing before food ever touches the grates.
What does seasoning a smoker actually do?
Seasoning — also called curing or breaking in — accomplishes three things before any food goes in.
Burns off manufacturing residues. Steel smokers leave the factory with protective coatings, cutting oils, and paint on the exterior that can migrate to the cooking chamber during high-heat operation. Even well-built smokers smell like hot metal and chemical finish when first fired up. Running the smoker empty for several hours drives off any volatile compounds and eliminates off-flavors before food is introduced.
Polymerizes the oil into a protective layer. When you coat interior metal with oil and heat it past the smoke point, the oil undergoes polymerization — it breaks down and chemically bonds to the metal surface. The result is a thin, dark, slightly hard layer similar in concept to seasoning cast iron. This patina builds with every subsequent cook and becomes increasingly non-stick and rust-resistant over time.
Protects against rust. Bare steel rusts quickly when exposed to the moisture, food drippings, and humidity that accumulate inside a smoker. The polymerized oil layer seals the metal from air and moisture between cooks. Without it, a new offset smoker stored outside can develop surface rust within weeks, even in dry climates.
What you need before you start
Gather these supplies before the seasoning run. You likely already have most of them.
High-smoke-point cooking oil. Vegetable oil, canola oil, avocado oil, or flaxseed oil all work well. Flaxseed oil produces the hardest, most durable polymerized layer of any food-grade fat and is a favorite among serious pit masters for this step. Avoid olive oil — its smoke point is too low and it produces acrid, foul-smelling smoke before polymerizing properly. Never use butter, which burns black from the dairy solids.
Paper towels or a clean cloth. For applying the oil to interior surfaces. Old cotton rags work just as well and can be discarded or washed afterward.
Heat-resistant gloves. Required for reaching into a warming firebox or adjusting grates early in the process.
A probe thermometer. The built-in dome gauge on most offset smokers reads 15–30°F hotter than actual grate level. Use a probe at grate height to verify real air temperature during the run.
Fuel. Enough charcoal (and wood splits for offset smokers) to sustain two to three hours of moderate heat. This is not a high-fuel operation — you are not cooking anything, just maintaining temperature.
Heat-resistant BBQ gloves on Amazon
Dual-probe wireless thermometer on Amazon
How to season an offset smoker: step-by-step
Offset smokers have the most raw exposed steel of any smoker type, which makes a thorough seasoning run especially important. The firebox, cooking chamber walls, grates, and heat shields all need attention.
Step 1: Remove all packaging, tags, and accessories. Pull out the cooking grates, removable heat deflectors, and ash pans. Wash the grates with warm soapy water to remove any factory oil from the metal. Rinse and dry everything completely before putting it back.
Step 2: Coat all interior surfaces with oil. Using a paper towel dipped in vegetable or canola oil, wipe the inside walls of the cooking chamber, the firebox interior walls, the firebox floor and grate, and both sides of the cooking grates. Apply a thin, even coat — visible but not dripping. Thick pooled oil bakes into sticky gummy patches rather than polymerizing smoothly, so wipe away any excess before you fire up.
Step 3: Build the fire and open all vents. Start a half-chimney of charcoal and let it fully ash over — about 15 minutes. Dump the lit coals into the firebox and add two or three small wood splits on top. Open the intake vent on the firebox fully and open the chimney exhaust vent fully. Full airflow is critical during the seasoning run; restricted vents cause smoldering and dirty combustion.
Step 4: Run at 275–300°F for 2–3 hours. Let the fire stabilize at 275–300°F at grate level. Maintain it in this range by adding a split every 60–90 minutes as needed. The goal is sustained moderate heat for long enough to fully polymerize the oil on every surface. You should see thin, nearly invisible blue smoke from the chimney — not thick white billowing smoke. If you see white smoke, open the firebox door briefly to feed it more air until it clears.
Step 5: Let the smoker cool completely. Once the run is complete, close all vents to starve the fire and let the smoker cool over two to three hours. The interior walls and grates should now show a darker, matte finish compared to their original raw-steel appearance. Any residual oil smell from the first 30 minutes of the run will be gone.
Your offset smoker is ready for its first real cook.
How to season a pellet smoker: step-by-step
Pellet smokers are built with powder-coated or painted exteriors and bare metal interiors. The process is straightforward and takes about 90 minutes total.
Step 1: Wipe down interior surfaces with oil. Remove the cooking grates, drip tray, heat deflector, and grease bucket. Wipe all interior metal surfaces with a thin coat of vegetable or canola oil — including the drip tray and heat deflector, which accumulate grease during cooks and benefit from an initial protective layer. Reinstall everything.
Step 2: Fill the hopper and run the startup cycle. Add a full hopper of your preferred hardwood pellets. Follow the manufacturer startup procedure exactly — this typically means powering on, setting a low temperature, and waiting for the auger to prime and the firebox to ignite. Many pellet smokers have a first-use startup mode or procedure outlined in the manual that clears any residue from the auger tube before normal operation.
Step 3: Set to maximum temperature and run for 45–60 minutes. Once the startup cycle completes and the smoker is producing clean heat, dial the temperature to the highest setting — typically 450–500°F depending on the model. Run with the lid closed for 45 to 60 minutes at maximum temperature. The high heat burns off factory residue quickly and fully polymerizes the thin oil coat on interior surfaces.
Step 4: Drop to 275°F and run for another 30 minutes. After the high-temperature phase, reduce to 275°F and run for an additional 30 minutes. This final phase ensures the drip tray and lower areas receive thorough coverage without the aggressive searing heat of maximum temperature, and it helps the firebox transition to a stable burn before shutting down.
Step 5: Allow the shutdown cycle to complete. Shut the smoker off per the manufacturer instructions and allow the full shutdown cycle to run — this burns off residual pellets in the firebox and is important on most pellet smoker models. Leave the lid closed during cooldown.
BBQ pellets variety pack on Amazon
How to season a kamado grill
Kamado grills — Big Green Egg, Kamado Joe, Primo, and similar — have ceramic or ceramic-composite bodies that require a different approach than metal smokers. The ceramic itself does not rust and does not need oil coating. What does benefit from seasoning are the cast iron cooking grates, metal hinge hardware, and any metal accessories.
Critical rule: heat slowly to avoid thermal shock. Ceramic can crack when heated too rapidly from cold. Never light a full chimney and dump it into a new kamado — or any kamado that has been sitting cold in winter storage. Always ramp temperature gradually.
Step 1: Oil the cast iron cooking grate only. Apply a thin coat of vegetable oil to the cast iron grate and any cast iron accessories (cast iron diffuser plates, cast iron grill rings). The ceramic dome, ceramic walls, and ceramic firebox do not need oil.
Step 2: Start a small fire and hold at 200°F for 30 minutes. Light a modest amount of lump charcoal in the center of the firebox. Leave the dome open for the first five to ten minutes to allow gases to escape. Then close the dome and stabilize at 200°F by adjusting the top vent and bottom draft vent. Hold at 200°F for 30 minutes.
Step 3: Raise to 300°F and hold 30 minutes. Gradually open the vents slightly to raise temperature to 300°F. Hold there for 30 minutes.
Step 4: Raise to 350°F and hold 60 minutes. Open the vents further to reach 350°F. Run at this temperature for one full hour with all vents fully open. This completes the oil polymerization on the cast iron and burns off any residue from the ceramic interior without thermal stress.
Step 5: Cool down gradually. Do not suddenly starve the fire at the end of the run. Begin closing vents slowly over 15–20 minutes to reduce temperature before shutting down completely. The gradual temperature drop is gentler on the ceramic than an abrupt shut-off.
How to season a kettle grill or electric smoker
Kettle grill. Remove the cooking grate and coat it with vegetable oil on both sides. Wipe the interior walls of the kettle bowl and the underside of the lid with a thin coat of oil. Build a two-zone fire with a full chimney of charcoal on one half. Replace the grate and lid. Run with both vents fully open at approximately 400°F for 45 to 60 minutes. The combination of high heat and full airflow completes the burn-in quickly. Let cool, wipe out any loose ash, and the kettle is ready to use for smoking or grilling.
Electric smoker. Wipe the interior walls, the racks, and the water pan (if included) with a thin coat of cooking oil. Place the wood chip tray in position but do not add water to the pan yet. Set the temperature controller to 275°F and run for two hours with the top ventilation port open. The element heats consistently, the oil polymerizes evenly, and any factory coating smell dissipates fully. At the end of the run, leave the door cracked for 15 minutes to let moisture escape before closing up for cooldown.
Common mistakes to avoid
Applying too much oil. This is the most common seasoning error. Thick oil coats do not polymerize — they pool, drip, and bake into sticky patches. You want barely visible coverage: a thin sheen, not a wet coat. If you can see oil pooling or dripping off the grate, you have applied too much. Wipe up the excess before starting the fire.
Skipping the seasoning run entirely. Some smoker manufacturers list the burn-in as optional. In practice, nearly all new metal smokers have factory residue that produces off-flavors in the first cook, and skipping the protection step means interior metal begins to rust from the first use. The seasoning run costs two to three hours and a small amount of fuel. The payoff is decades of better performance from the metal.
Using olive oil or butter. Olive oil smokes aggressively before reaching polymerization temperature and produces a foul smell throughout the run. Butter burns black from the dairy solids and leaves carbonized residue rather than a clean polymerized layer. Stick to vegetable, canola, avocado, or flaxseed oil.
Heating a kamado too fast. Thermal shock can crack the ceramic on a kamado grill, and new units are especially susceptible before the ceramic has been through multiple heat cycles. Always ramp in stages — 200°F, then 300°F, then 350°F — and never jump directly to high heat from cold.
Closing the vents during the run. Restricted airflow produces smoldering and incomplete combustion during the seasoning run. You want clean burning to drive off residues efficiently. Keep all vents fully open throughout the entire run.
Do I need to re-season a smoker?
Yes, periodically. The initial seasoning creates the foundation of the protective layer, but it does thin over time, especially in high-use situations or after deep cleanings that remove built-up patina.
Re-season your smoker if you notice:
- Surface rust developing on interior walls or grates
- The interior surface looks bare, shiny, or stripped after a deep scrub
- The smoker was stored outside for an extended period without a cover
- You had to wire-brush heavy rust and bare metal is visible again
Re-seasoning uses the same process as initial seasoning: wipe all interior surfaces with a thin coat of oil and run at 300°F for two hours with vents fully open. For most regular smokers who cook weekly, re-seasoning once or twice per year is standard maintenance. Doing it at the start and end of grilling season covers most situations.
Cooking oil spray for grill seasoning on Amazon
FAQ
Frequently asked questions
Do I have to season a new smoker before using it?
What oil should I use to season a smoker?
How long does it take to season a smoker?
Can I use cooking spray to season a smoker?
What temperature should I season a smoker at?
How do I know when the seasoning run is done?
Do I need to re-season a smoker every year?
Bottom line
Seasoning a new smoker is a two-to-three hour investment that pays returns over the entire life of the cooker. A thin coat of high-smoke-point oil, run at the right temperature for each smoker type, burns off factory residues, builds a rust-resistant interior layer, and sets you up for decades of clean-tasting cooks. The details differ by design — ramp slowly on a kamado, run at maximum temperature on a pellet grill, coat every interior surface on an offset — but the principle is universal. Do it before your first cook, maintain it with periodic re-seasoning, and your smoker will perform better from day one and last considerably longer.
For related reading: how to use a smoker from setup to first slice, offset vs. pellet smoker: which design is right for you, best smokers at every price point, or best wood chunks for smoking and flavor pairings.