guides
How to Use a Smoker: Complete Beginner Guide
Learn how to use a smoker from setup to the first slice. Covers wood selection, temperature control, and timing for every major smoker type.
 Cole Whitaker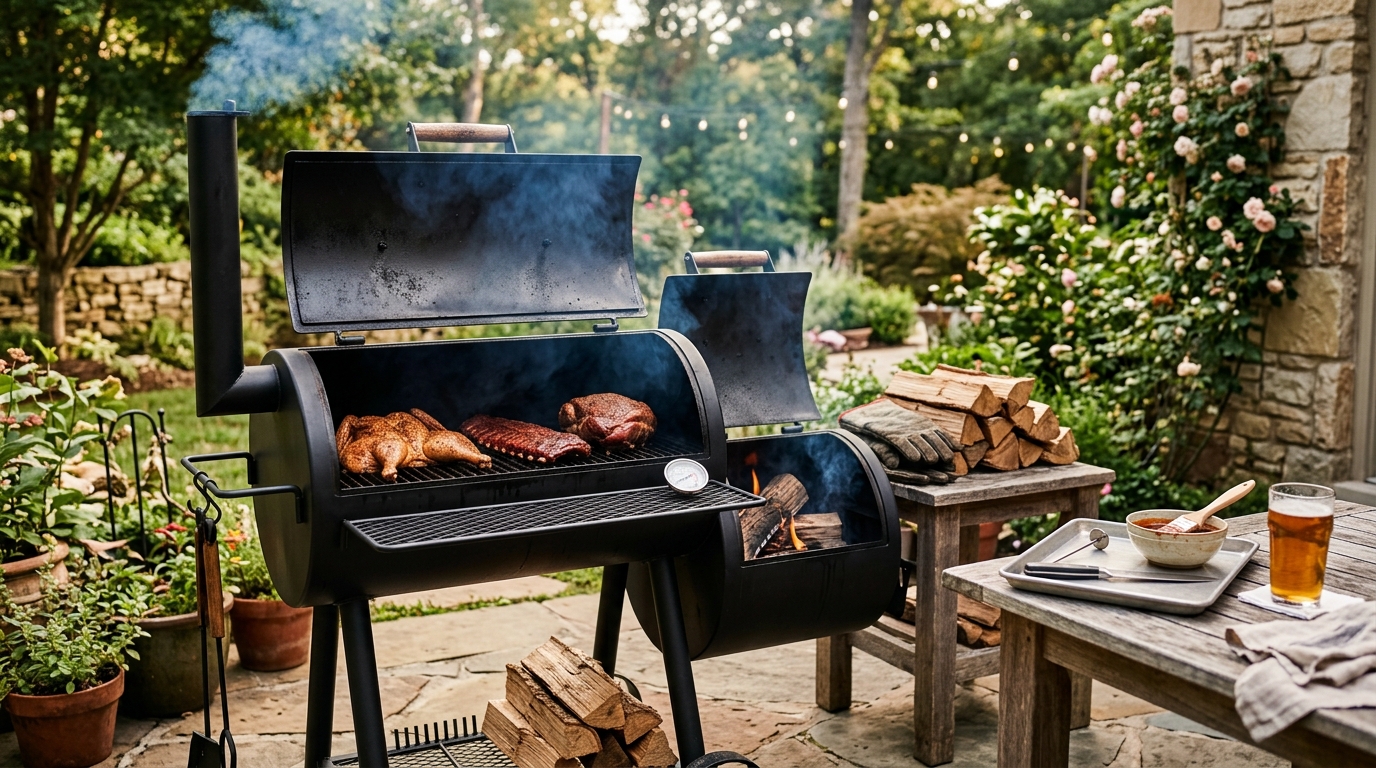
The single most important thing to know about using a smoker: low heat and patience win every time. Set your cooker to 225–250°F, add your chosen wood, place the meat on the grate, and plan for 1 to 1.5 hours per pound for most large cuts. The actual hands-on work is minimal — the smoker does the cooking; your job is maintaining the fire and monitoring temperature.
What type of smoker do you have?
Different smoker designs require different management techniques. The core process is identical — indirect heat plus wood smoke at low temperature — but fire management varies significantly by type.
| Product | Best for | Rating | Notes | |
|---|---|---|---|---|
| Offset smoker | Traditional bark and smoke rings on large cuts | ★★★★★ | Firebox sits beside the cooking chamber. Requires the most active fire management — add splits every 45–90 minutes. Steep learning curve, highest reward. | — |
| Pellet smoker | Set-and-walk-away convenience, consistent results | ★★★★☆ | Automated auger feeds wood pellets to maintain temperature. Minimal management once running. Lighter smoke flavor than offset by default. | — |
| Kettle grill | Budget entry point, dual-use grill and smoker | ★★★★☆ | Use the two-zone charcoal method with wood chunks on coals. More frequent charcoal additions needed. Very capable with practice. | — |
| Kamado grill | Excellent heat retention, minimal fuel use | ★★★★☆ | Ceramic shell holds heat exceptionally well. Runs for hours on a single load of lump charcoal plus wood chunks. | — |
| Electric smoker | Simplest operation, most beginner-friendly | ★★★★☆ | Plug in, set temperature, load wood chips. Very easy but produces lighter smoke and lacks the deep bark of charcoal methods. | — |
Equipment you need before you start
You do not need expensive gear to smoke good meat, but a few items are non-negotiable.
The essentials:
- A dual-probe thermometer — one probe rests on the cooking grate to verify actual air temperature, the second goes in the thickest part of the meat
- A chimney starter (for offset and kettle smokers)
- Heavy-duty foil or unwaxed butcher paper for wrapping during the stall
- Insulated gloves rated for high heat
- A spray bottle filled with apple juice, apple cider vinegar, or plain water for spritzing
The built-in dome thermometer on most smokers reads the temperature at the dome — not at the grate surface where the meat actually sits. On offset smokers in particular, the dome reads 15–30°F hotter than grate level. Never rely on the built-in gauge alone.
Recommended thermometer: dual-probe wireless meat thermometer on Amazon
Optional but useful:
- A chimney heat deflector or tuning plates for offset smokers to even out hot spots near the firebox
- A smoke tube loaded with pellets for extra smoke output on pellet grills
- Disposable foil grill mats under the drip zone for easier cleanup
How to use an offset smoker: step-by-step
An offset smoker has two chambers: the firebox on one side where you burn wood, and the larger cooking chamber where the meat sits. Heat and smoke travel from the firebox across the cooking grate and exit through the chimney on the far end.
Step 1: Season a new smoker before first use. If the smoker is new, coat the interior walls and grates with cooking oil (a spray or cloth wipe) and run it at 250–275°F for two to three hours. This cures the metal, bakes on a protective carbon layer, and burns off any factory residues. Skip this step on a used smoker.
Step 2: Build your fire. Fill a chimney starter half-full with charcoal briquettes or lump charcoal and light it. Wait until the top coals are fully ashed over — about 15 to 20 minutes. Dump the lit coals into the firebox and add one or two splits of cooking wood on top. Wait for the wood to ignite and the visible orange flames to die down before adjusting vents.
Step 3: Dial in the temperature. Open the firebox intake vent fully and close the chimney exhaust vent to about 50%. Watch the grate-level probe. Open intake vents to raise temperature; close them to lower it. The exhaust vent should stay at least half-open at all times — use the intake as your primary control. Stabilize at 225–250°F before adding meat.
Step 4: Place the meat and add wood. Once temperature is stable, place the meat on the grate in the cooking chamber, toward the chimney end and away from the firebox. Add one small split of wood to the firebox. What you want is thin, almost-invisible blue smoke coming from the chimney. Thick white billowing smoke indicates incomplete combustion and produces bitter, acrid flavor — open the firebox door briefly to feed it more air until it clears.
Step 5: Maintain the fire. Check the firebox every 45 to 60 minutes. When the grate temperature drops 15°F or more below target, add another split. Pre-warming the next log alongside the firebox — close but not inside — speeds ignition and produces cleaner combustion when you add it. Small, consistent fuel additions beat infrequent large ones every time.
Step 6: Spritz the meat every 60–90 minutes (optional). After the first two hours, lightly spritz the exposed meat surface with apple juice or apple cider vinegar every 60 to 90 minutes. This slows the exterior from drying out and adds a subtle layer of flavor. Do not over-spritz — every time you open the cooking chamber you lose heat and add time to the cook.
Step 7: Handle the stall. At some point between 150°F and 170°F internal temperature, the meat will stop rising for what feels like far too long — sometimes two to four hours. This is the stall. Evaporative cooling from moisture in the connective tissue matches the rate of heat input, plateauing the temperature. It is entirely normal. When the stall begins, wrap the meat tightly in butcher paper or heavy-duty foil and return it to the smoker. The wrap eliminates evaporation and pushes through the stall without steaming away the crust.
Step 8: Pull at target temperature and rest. Brisket: pull at 200–205°F internal. Pork shoulder: 195–205°F. Pork ribs: probe-tender between bones (the probe should slide in with almost no resistance), which is more reliable than temperature alone for ribs. Wrap the pulled meat tightly in foil, then towels, and place it in a cooler for at least 30 minutes. Internal temperature continues rising 5–10°F during the rest, and the muscle fibers relax and reabsorb the juices that would otherwise pour out at the cut.
How to use a pellet smoker: step-by-step
Pellet smokers are the most beginner-friendly option because temperature management is fully automated. The learning curve shifts from fire management to understanding smoke output and pellet consumption.
Step 1: Fill the hopper and select your pellets. Add your chosen hardwood pellets to the hopper — the large bin, usually on the right side. Use a single wood species to start; blends work fine once you know your preferences. Keep pellets dry; moisture swells the compressed wood and causes jams in the auger.
Step 2: Start up and preheat. Turn the power on and set the temperature to 225°F. Close the lid and allow the smoker to preheat for 15 to 20 minutes. Most models run a startup cycle that primes the firebox and auger — follow the manual for yours. Some models have a dedicated smoke setting (typically 165–180°F) that maximizes smoke output before transitioning to cooking temperature.
Step 3: Place meat and monitor pellet level. Once preheated, place the meat on the grate. The smoker maintains temperature automatically via the auger and fan. Your primary jobs are monitoring meat temperature on your probe thermometer and checking the hopper every two to three hours. Pellet consumption varies — expect 1 to 3 pounds per hour depending on temperature and ambient conditions.
Step 4: Maximize smoke flavor if needed. Pellet smokers produce lighter smoke than offset smokers by default because the burn is cleaner and more complete. For a deeper smoke character: start the cook in smoke mode for the first two hours before raising to 225°F, or add a smoke tube loaded with pellets and lit at one end. The tube produces cold smoke regardless of the main grill temperature and adds meaningful extra flavor on long cooks.
A smoke tube for extra output: stainless steel smoker tube on Amazon
Step 5: Handle the stall and rest. Identical to offset: wrap in butcher paper or foil at the stall, pull at correct internal temperature, and rest before slicing.
Choosing your wood
Wood selection affects flavor more than most variables other than technique. The general principle: smoke intensity should match the protein — delicate fish and chicken pair with mild woods; bold beef brisket handles bold smoke.
Mild woods — apple, cherry, peach, alder. Best for chicken, fish, pork ribs, and turkey. Apple adds subtle sweetness; cherry produces a rich mahogany color on the bark in addition to mild flavor. These are the most forgiving woods for beginners and are difficult to over-smoke.
Medium woods — hickory, pecan, maple. Hickory is the classic American BBQ wood and pairs well with pork shoulder, ribs, and chicken. Pecan is slightly sweeter and more complex. Maple complements poultry and ham particularly well and produces a clean, balanced smoke.
Bold woods — post oak, mesquite. Post oak is the wood of choice for Texas-style brisket: long-burning, steady heat output, and a deep smoke that complements beef without overwhelming it. Mesquite burns hot and produces intense, earthy smoke — effective in small amounts for quick cooks but overwhelming on a brisket that runs 12 or more hours.
Woods to avoid: softwoods (pine, cedar, fir), moldy or green-cut wood, and any treated or painted lumber. Softwoods contain resins that produce toxic creosote. Green wood burns dirty. Treated wood produces toxic smoke that is a genuine health hazard.
A wood chunk variety sampler: cooking wood chunks variety pack on Amazon
Temperature and timing reference
| Cut | Target Internal Temp | Approx. Time at 225°F |
|---|---|---|
| Brisket (full packer, 12–16 lb) | 200–205°F | 12–18 hours total |
| Pork shoulder (bone-in, 8–10 lb) | 195–205°F | 12–16 hours total |
| Pork spare ribs (full rack) | Probe-tender | 5–6 hours |
| Baby back ribs | Probe-tender | 4–5 hours |
| Whole chicken (4–5 lb) | 165°F in breast | 3–4 hours |
| Salmon fillet | 140–145°F | 1–2 hours |
| Whole turkey (12–15 lb) | 165°F in thigh | 6–8 hours |
Always use a dedicated probe thermometer to verify doneness. Color and time estimates are useful guides; internal temperature is the only reliable indicator of food safety and texture.
Common beginner mistakes
Over-smoking with too much wood. Thin blue smoke for the first two to three hours is enough to flavor the meat’s exterior. After that, the smoke ring has formed and the surface is set — additional wood primarily sustains fire temperature. Heavy white smoke at any point produces acrid, bitter flavor that cannot be reversed.
Large, infrequent fuel additions. Dumping four splits into the firebox at once spikes temperature and produces a rush of thick smoke. Small, consistent additions every 45 to 60 minutes are far better for both temperature stability and smoke quality.
Opening the cooking chamber constantly. Every time you open the lid you lose 15 to 30 minutes. On a 12-hour brisket cook, opening every 30 minutes can add two to three hours. Trust the process and the thermometer probes.
Slicing immediately after pulling. Cutting into a brisket or pork shoulder straight off the smoker sends the juices pouring out rather than redistributing through the meat. The 30-minute rest minimum is not optional — for a large brisket, 60 minutes in a towel-wrapped cooler is better.
Starting with brisket. Brisket is the hardest major BBQ cut because the margin for error across a 12-plus-hour cook is thin. Begin with pork shoulder (wide window, very forgiving), chicken thighs (fast, instructive), or pork ribs (intermediate). Once you understand fire management and the stall on forgiving cuts, move to brisket.
FAQ
Frequently asked questions
How long does it take to smoke a brisket?
What temperature should a smoker run at?
How much wood do I need for a long smoke?
What wood is best for smoking brisket?
What is the stall and how do I push through it?
Can I use a regular grill as a smoker?
Why does my smoke taste bitter?
Bottom line
Using a smoker rewards patience far more than technical complexity. The fundamentals cover most of what separates mediocre barbecue from great barbecue: stable temperature in the 225–250°F range, clean thin smoke for the first two to three hours, a dual-probe thermometer tracking both grate and meat temperature, and a proper rest before slicing. Start with forgiving cuts — pork shoulder and chicken thighs before brisket — use wood appropriate to the protein, and resist the urge to constantly open the cooker. The less you interfere with a properly-built fire, the better the results.
For related reading: best smokers at every price point, best BBQ pellets for flavor and consistent burns, best grill thermometers for accurate temperature, or charcoal vs. pellet vs. gas: which fuel type wins.