guides
How to Smoke Pork Shoulder: Step-by-Step Guide
Smoke pork shoulder to pull-apart perfection. Complete guide covers timing, temps, the stall, bark building, and resting for the best pulled pork.
 Cole Whitaker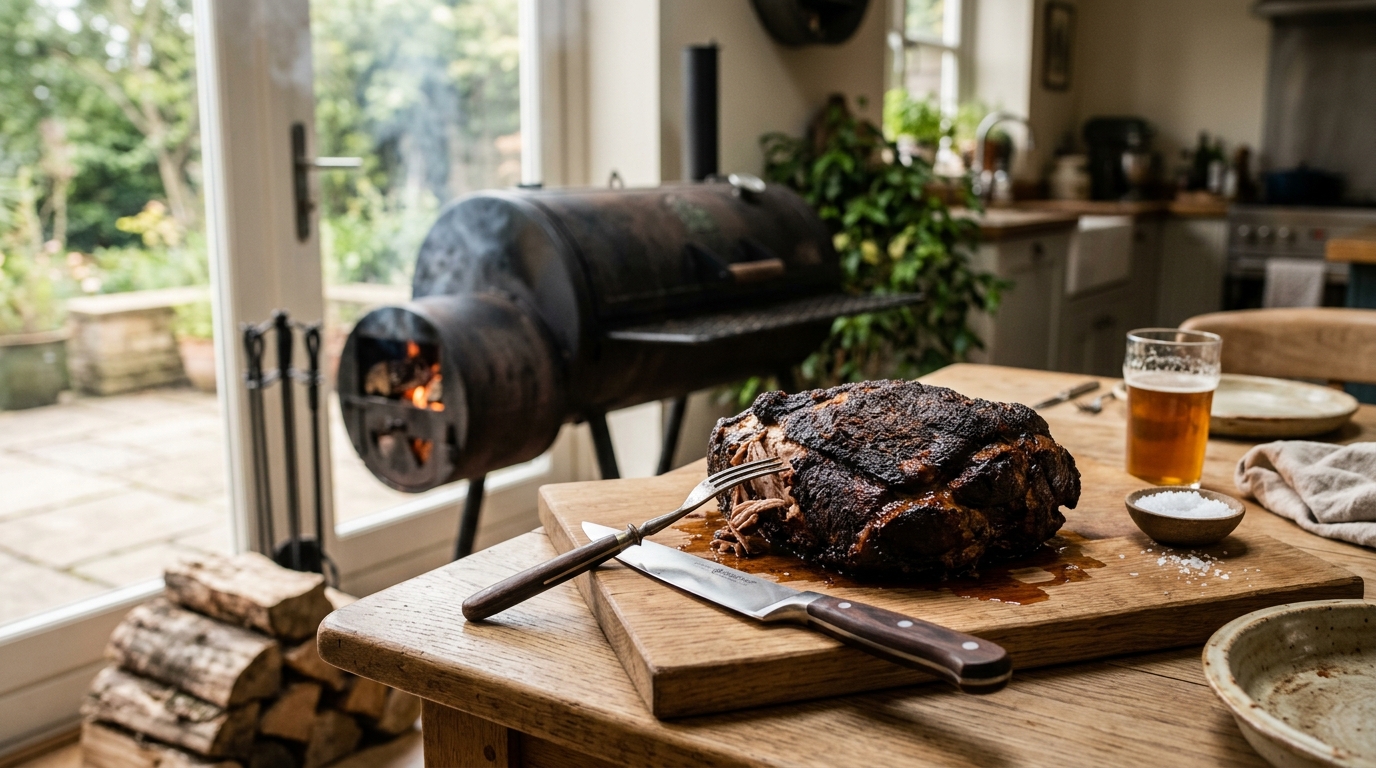
The best way to smoke pork shoulder: run your smoker at 225–250°F, apply a generous dry rub the night before, and cook bone-in pork butt for 1 to 1.5 hours per pound — typically 12 to 16 hours — until the internal temperature reaches 200–205°F. Pull, rest for at least one hour, then shred.
Bone-in vs boneless pork shoulder: which should you smoke?
Both cuts come from the upper front leg of the pig but behave differently on the smoker. Here is how they compare.
| Product | Best for | Rating | Notes | |
|---|---|---|---|---|
| Bone-in pork butt | Maximum flavor, beginners, long cooks | ★★★★★ | Also called Boston butt or bone-in shoulder. The bone slows the cook slightly but adds flavor and signals doneness — when the bone pulls out cleanly with no resistance, the pork is done. The most common choice for smoked pulled pork. | — |
| Boneless pork butt | Uniform cook, faster timing, easier slicing | ★★★★☆ | Cooks slightly faster and more evenly without a bone altering heat distribution. Better for injections and bark coverage on all sides. Requires close temperature monitoring throughout since the bone doneness indicator is absent. | — |
| Picnic shoulder | Deeper flavor, budget cooks, large crowds | ★★★★☆ | The lower portion of the shoulder with more skin, fat, and connective tissue. Produces rich, intensely flavored pulled pork but requires longer cooking to break down the additional collagen. Excellent value per pound. | — |
For most backyard cooks, bone-in pork butt is the right starting point. It is widely available, forgiving to cook, and the bone provides a built-in doneness check. A 8 to 10 pound bone-in butt feeds 8 to 12 people after shrinkage and bone removal.
Equipment you need
A dedicated smoker produces the best results, but a kettle grill or gas grill set up for indirect heat works well too.
Non-negotiable:
- A smoker, kettle grill, or gas grill capable of maintaining 225–250°F over indirect heat for 12+ hours
- A dual-probe digital thermometer — one probe at grate level to monitor pit temperature, one inserted in the meat to track internal temperature throughout the cook
- Heavy-duty aluminum foil or unwaxed pink butcher paper for the wrap phase
- Heat-resistant gloves for handling a full pork butt off a hot smoker
Highly recommended:
- A meat injection needle and a simple apple juice or broth injection to keep the interior moist during a 12+ hour cook
- A spray bottle with apple cider vinegar or apple juice for spritzing during the first few hours
- An insulated cooler for the rest phase — wrapped in towels, a finished pork shoulder stays serving-temperature hot for up to 4 hours
A dual-probe wireless thermometer is the single most useful tool for long cooks: wireless dual-probe meat thermometer on Amazon
Step 1: Prep the pork shoulder the night before
Good pulled pork starts the night before the cook, not when the fire lights.
Trim excess fat. Leave roughly 1/4 inch of fat cap on the exterior — this bastes the meat during cooking. Trim any section thicker than 1/4 inch; excessive fat insulates the surface and slows bark formation without contributing additional flavor. Remove any large, hard lumps of internal fat that will not render during a long cook.
Inject for interior moisture (optional but recommended). A simple injection of 1 cup apple juice mixed with 1/4 cup melted butter, 1 tablespoon Worcestershire sauce, and 1 teaspoon kosher salt pushed into the meat at 1-inch intervals throughout the shoulder helps maintain moisture during the final hours. This step matters most on boneless cuts and in dry climates where surface moisture evaporates faster.
Apply the dry rub. Coat all surfaces generously with a dry rub built on kosher salt, coarse black pepper, brown sugar, smoked paprika, garlic powder, onion powder, and cayenne. Press the rub firmly into the surface rather than rubbing it back and forth, which smears the rub off instead of making it adhere.
After applying rub, place the shoulder uncovered on a rack in the refrigerator overnight — 8 to 12 hours. The salt draws surface moisture out, which then reabsorbs with dissolved salt. This seasons the meat more deeply than surface rub alone and dries the exterior for better bark development on the smoker.
A ready-made competition pork rub: pork shoulder dry rub BBQ on Amazon
Step 2: Build your fire and stabilize temperature
Bring the pork shoulder to room temperature for 30 to 45 minutes while the smoker climbs to target temperature. Placing cold meat on a hot smoker extends the initial climb and shifts your timing estimates unpredictably.
Target smoker temperature: 225°F for the most forgiving, traditional result. 250°F is also common and shortens the cook by roughly 1 to 2 hours while producing a slightly firmer exterior. Avoid exceeding 275°F during the early hours — higher heat tightens the exterior before the interior collagen has time to break down, resulting in meat that is dry rather than pull-apart tender.
For offset smokers: Establish a clean-burning fire that produces thin blue smoke — not thick white smoke, which deposits acrid compounds on the meat surface. Use a half chimney of lit charcoal as the base and add wood splits every 45 to 60 minutes to maintain temperature.
For pellet smokers: Set to 225°F and place a smoke tube filled with competition blend or hickory pellets on the grate to boost smoke output during the first 4 hours, when the meat absorbs smoke most readily.
For kettle or kamado grills: Use a snake or Minion method charcoal arrangement with wood chunks buried in the coals. Bank fuel to one side and position the pork shoulder over the indirect zone with the top vent positioned above the meat to draw smoke across it.
A charcoal chimney starter makes every fire consistent: charcoal chimney starter on Amazon
Step 3: Smoke the shoulder
Place the pork shoulder fat-side up on the smoker grate over indirect heat. Insert a leave-in probe into the thickest part of the meat, avoiding contact with the bone. Record the start time and close the smoker.
Hours 0–4 (smoke absorption phase): This is when the cold meat takes on the most smoke. Keep the smoker temperature steady at 225–250°F. Begin spritzing the exterior every 60 to 90 minutes after the first 2 hours with apple cider vinegar, apple juice, or a 50/50 mixture of both. Spritzing cools the surface slightly, slows premature crust formation, and promotes a deeper, more layered bark over time without washing off the rub.
Resist opening the smoker more than necessary. Every lid-opening event loses heat and smoke, extending the cook by 15 to 20 minutes per opening.
Hours 4–8 (deep color and bark development): By this point the exterior should show a dark mahogany color and a firm crust that does not dent when pressed. The internal temperature climbs steadily through this phase until it enters the stall — typically between 155°F and 170°F — where it stops rising.
Step 4: Navigate the stall
The stall is the most common point where inexperienced cooks panic. At roughly 155–170°F internal temperature, the thermometer stops climbing and may hold flat for 2 to 4 hours or more. This is normal physics — evaporative cooling from the meat surface exactly offsets the smoker heat input, creating a temperature plateau.
Option 1 — Wait it out. Keep the smoker at 225°F and continue cooking without intervening. The stall ends on its own when enough surface moisture has evaporated. This approach produces the firmest, most deeply developed bark but requires the most schedule flexibility.
Option 2 — The Texas Crutch (wrap). Remove the shoulder from the smoker and wrap tightly in two layers of heavy-duty aluminum foil or a double layer of unwaxed pink butcher paper. Return to the smoker at 225–250°F. Wrapping ends the stall by eliminating the evaporative surface cooling. Foil wrapping speeds the cook most aggressively and produces a slightly softer bark. Butcher paper accelerates less than foil but preserves significantly more bark texture — the preferred choice for most backyard cooks.
Most competition-style cooks wrap at the stall and raise to 250°F for the wrapped phase to push through it efficiently without sacrificing too much bark.
Post-stall targets: 195°F for sliceable pulled pork; 200–205°F for the full pull-apart texture used for pulled pork sandwiches and barbecue plates.
Step 5: Pull from the smoker and rest
Once the internal temperature reaches 200–205°F, test probe tenderness throughout the shoulder. The probe should slide in with zero resistance — often described as probing warm butter — in every spot you test, not just the center. On bone-in cuts, try grasping the exposed bone with a towel: a finished shoulder lets the bone wiggle freely and pull out with almost no effort.
The rest is not optional.
Wrap the shoulder tightly in butcher paper or foil, then wrap that in two large kitchen towels, and place in an insulated cooler. Rest for a minimum of 60 minutes. Ninety minutes to 2 hours produces even better results. Resting allows muscle fibers to relax and reabsorb juices that moved toward the center during cooking. Skipping or cutting short the rest produces drier, less cohesive pulled pork regardless of how well the cook went.
A large lidded cooler doubles as a resting chamber and holds the shoulder at serving temperature for up to 4 hours — extremely useful when timing a cook to a specific mealtime.
Shredding: After resting, remove the bone cleanly with a twist — it should come free with no effort. Shred the meat using two forks, heat-resistant gloves, or a pair of meat claws. Remove any large pieces of collagen or hard fat that did not render fully. Season pulled pork with a light dusting of additional dry rub and a splash of apple cider vinegar or a thin coat of your preferred sauce. Serve extra sauce on the side.
Meat claws make shredding a 10-pound shoulder take under 3 minutes: BBQ meat shredding claws on Amazon
What wood is best for smoking pork shoulder?
Pork shoulder is on the smoker for 12 to 16 hours, giving it substantial time to absorb smoke. The wrong wood or too much of it makes the final product bitter and acrid.
Hickory is the classic American BBQ choice for pork shoulder and the backbone of most Carolina and Memphis-style pulled pork flavor profiles. Bold, earthy, and deeply smoky. Use it confidently for the full cook or blend it at a 1:1 ratio with apple for a softer, more balanced result.
Apple is mild and slightly sweet, producing a beautiful mahogany color on the bark without aggressive smoke flavor. The best choice when feeding a mixed crowd or anyone sensitive to heavy smoke. Apple alone on pork shoulder produces a sweeter, more mellow bark.
Cherry is similar to apple in intensity, with a slightly deeper sweetness and rich, dark color. Excellent blended with hickory — cherry adds color and sweetness while hickory provides depth and body. A 1:1 cherry-to-hickory blend is a proven competition combination for pork.
Pecan sits between fruit woods and hickory in intensity: nutty, rich, and very complementary to pork fat. An underrated choice that produces outstanding results with none of the risk of over-smoking.
Avoid for pork shoulder: Mesquite is far too intense for a 12+ hour low-and-slow cook and produces bitter results. Pine, cedar, and any resinous softwood should never be used for cooking.
For offset smokers use splits; for pellet smokers choose competition blend, hickory, or apple pellets; for kettle and kamado grills use fist-sized wood chunks placed directly on lit coals: smoking wood chunks variety pack on Amazon
How do you know when smoked pork shoulder is done?
Three indicators together give you a confident read:
1. Internal temperature. Target 200–205°F measured in the thickest part of the meat, away from the bone. This is the most reliable indicator and should be checked with a calibrated thermometer.
2. Probe tenderness. An instant-read thermometer probe or a wooden skewer should slide into the meat with near-zero resistance everywhere you test — not just in one spot. Any stiffness means more time is needed.
3. Bone wiggle test (bone-in cuts only). Grip the exposed bone and try to wiggle and rotate it. A properly finished shoulder allows the bone to rotate freely and slide out cleanly with minimal effort. Resistance means more cooking time is needed.
Do not short-cut on temperature. A shoulder that reads 185°F is not done. The collagen has not yet converted to gelatin, and the meat will be chewy and tight rather than pull-apart tender regardless of how many hours it has been cooking.
Common mistakes when smoking pork shoulder
Starting from refrigerator-cold. Placing cold meat directly on a hot smoker extends the initial temperature climb unpredictably and creates uneven cooking from edge to center. Rest at room temperature for 30 to 45 minutes first.
Opening the lid too often. Every lid-opening event loses heat and smoke. Monitor grate and meat temperature remotely with a wireless thermometer and resist lifting the lid until the scheduled spritz or wrap point.
Pulling at time instead of temperature. Pork shoulder is done when internal temperature and probe tenderness confirm it — not when a set number of hours has elapsed. Starting weight, bone placement, smoker temperature variations, and weather all shift the actual finish time.
Skipping the rest. A minimum 60-minute rest in a towel-lined cooler is non-negotiable for juicy pulled pork. There are no shortcuts here that do not sacrifice the final texture.
Over-processing when shredding. Pull the meat into rough strands and chunks — leave some larger pieces for texture contrast. Processing it into a fine, uniform mince loses the varied texture that makes great pulled pork so satisfying.
FAQ
Frequently asked questions
How long does it take to smoke a pork shoulder?
What temperature should you smoke pork shoulder at?
What internal temperature is pork shoulder done for pulling?
What is the stall and how do you get through it?
Fat side up or fat side down when smoking pork shoulder?
How long should you rest pork shoulder after smoking?
How much pulled pork does one pork shoulder make?
Bottom line
Smoking pork shoulder rewards patience over technique. The fundamentals — overnight rub and dry brine, a stable 225°F smoker, a confident wrap when the stall hits, and a mandatory rest before pulling — account for most of what separates great pulled pork from average pulled pork. Start with a bone-in pork butt, choose hickory or a hickory-apple blend for smoke, monitor with a dual-probe wireless thermometer throughout, and give the rest phase its full 60 to 90 minutes. The payoff is deeply smoky, pull-apart pork shoulder with a thick, bark-covered exterior that works as well on sandwiches and tacos as it does straight off the board.
For related reading: how to use a smoker: complete beginner guide, brisket smoking guide: timing, temps, and the wrap, best instant-read thermometers for grilling and smoking, and how to smoke pork ribs: the 3-2-1 method explained.