guides
How to Grill Corn on the Cob
Grill corn on the cob three ways — husked, in the husk, or foil-wrapped. Step-by-step guide with timing, temps, and seasoning ideas for perfect results.
 Cole Whitaker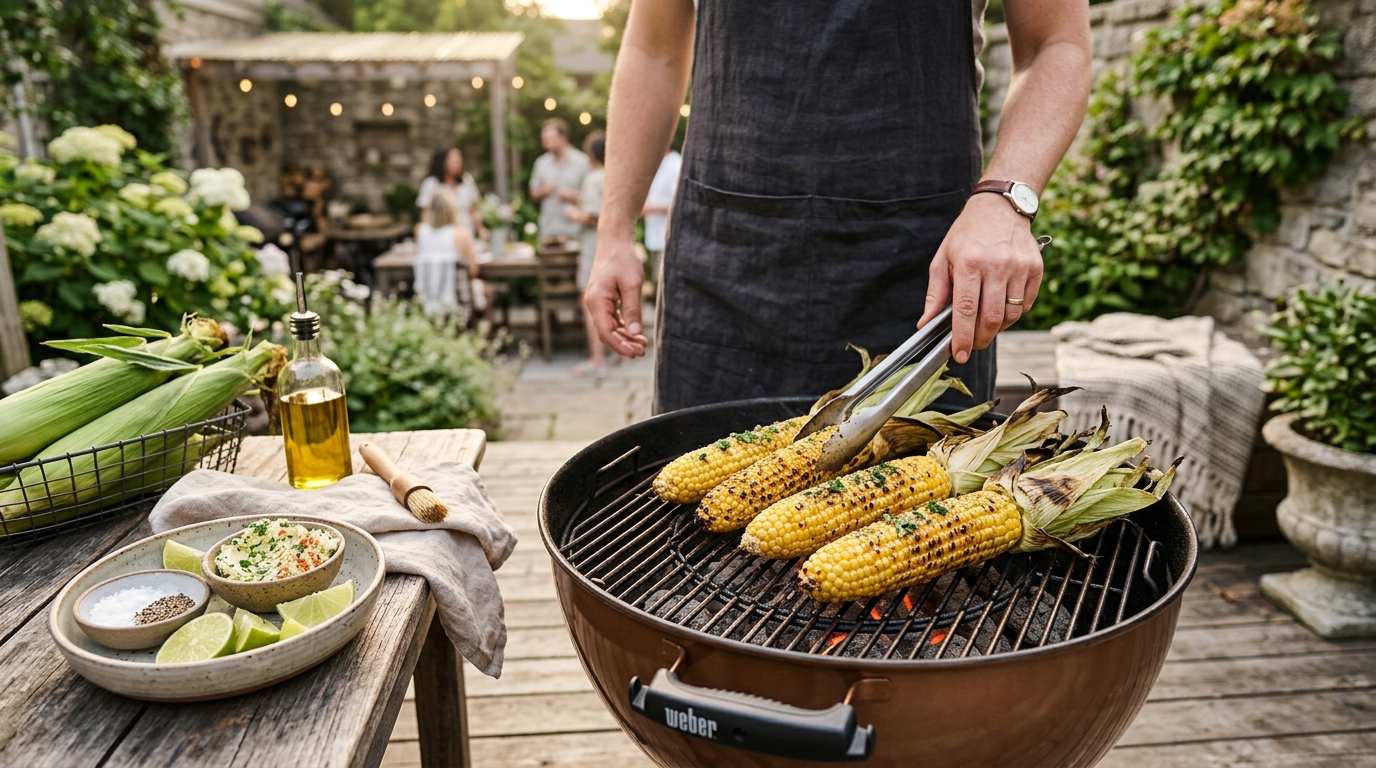
Husk the cob, brush with oil, and grill over direct medium-high heat (400–450°F) for 10–12 minutes, turning every 3 minutes. For a softer, steamed result, soak the corn in water for 15 minutes and leave the husk on — grill for 15–18 minutes. Husked corn develops better char; in-husk corn stays more tender and sweet.
Which grilling method is right for your corn?
Three grilling methods produce noticeably different results. The right choice depends on how much char you want, whether you prefer a crisp or tender kernel, and how much prep time you have available.
| Product | Best for | Rating | Notes | |
|---|---|---|---|---|
| Husked (direct heat) | Maximum char and smoky flavor | ★★★★★ | Best result for sweet corn fans who want visible grill marks and roasted flavor. Quick prep — just remove the husk and silk. Kernels can dry out slightly if overcooked, so watch the timing carefully. | — |
| In the husk (soaked) | Steamed, tender texture with mild smoke | ★★★★★ | The husk acts as a natural steam wrapper. Soaking for 15 minutes prevents burning. Takes 15–18 minutes. Slightly less char on the kernels but more moisture is retained throughout. | — |
| Foil-wrapped | Even cooking, customizable flavor | ★★★★☆ | Husk the corn, add butter and seasonings, then wrap tightly in two layers of foil. Produces a very steamed result with no char. Best for those who prefer soft corn without the smoky edge. | — |
| In the husk (dry, no soak) | Campfire-style char, minimal prep | ★★★★☆ | No soak needed but outer husk layers may char heavily or ignite before the corn is done. Works over a campfire with careful positioning. The inner husk still protects the kernels. | — |
For most backyard cooks, husked corn over direct heat is the best balance of speed, flavor, and presentation. It takes 10–12 minutes and comes off the grill with appetizing char marks. The in-husk method is a better choice when cooking for a large crowd and wanting consistent results across a big batch.
What you need to grill corn
The equipment list is short. The main decisions are whether to use tongs or a corn gripper, and whether to apply butter before or after grilling.
Basic equipment:
- A grill (gas, charcoal, or pellet — all work equally well for corn)
- Long-handled tongs or a corn holder with skewers
- A basting brush for oil or butter application
- Heavy-duty aluminum foil (if using the foil-wrap method)
Recommended gear:
Long-handled grill tongs on Amazon — 16-inch or longer keeps your hands away from the heat zone when turning corn and other vegetables. Look for locking tongs that are dishwasher safe.
Corn on the cob holders on Amazon — stainless skewer-style holders make turning and eating easier, and give each person a handle to hold without burning their fingers. Buy in pairs.
Oil selection: Any neutral high-smoke-point oil works — canola, vegetable, or avocado oil. Olive oil is fine at 400°F but can smoke at higher temperatures. A very light coating is all you need; too much oil causes flare-ups when it drips onto the coals or gas burners.
Butter timing: Add butter after the corn comes off the grill for the cleanest flavor. Butter applied before grilling burns at the temperatures needed for char and produces off-flavors. The exception is foil-wrapped corn, where the butter is sealed inside the packet and never touches direct flame.
How to grill corn on the cob: step-by-step
This guide covers all three methods. Choose the one that fits your preference, then follow the numbered steps.
Method 1: Husked corn over direct heat
1. Prep the corn. Pull back the husks and remove all silk from each ear. The silk is easiest to remove under running water — stubborn strands stick to wet fingers and pull away cleanly. Remove the husks completely or snap them off at the base. Inspect the kernels: fresh corn should look plump, bright, and tightly packed from tip to base.
2. Dry and oil the corn. Pat the corn dry with a paper towel. Brush all sides lightly with canola or avocado oil. Oil prevents sticking and promotes even browning across the surface. Season with kosher salt and cracked pepper now, or hold all seasoning until after the cook — both approaches work, but seasoning later keeps the surface drier for better char.
3. Preheat the grill to medium-high heat. Target 400–450°F at the grate level. For a gas grill, set all burners to medium-high and preheat for 10–12 minutes with the lid closed. For charcoal, light a full chimney and spread the coals for a single-zone setup when all coals are covered in grey ash. Corn does not need a two-zone fire — direct heat is the right approach throughout.
4. Grill the corn. Place each ear directly on the grate over the heat. Close the lid. Rotate the corn a quarter turn every 3 minutes using long tongs. You are aiming for bright yellow kernels with golden-to-light-brown charred spots on the high points. Do not press the corn or adjust it between turns. Total time: 10–12 minutes.
5. Check for doneness. Press a kernel with a fingernail or the tip of a paring knife. Done kernels feel tender but not mushy and release a small amount of milky liquid when pierced. Bright yellow color throughout (rather than pale starchy yellow) confirms the corn is fully cooked. A few charred dark spots on the high-contact areas is normal and desirable.
6. Serve immediately. Corn holds heat well — use a corn holder or a folded paper towel as a handle. Apply butter and toppings while the surface is still hot so they melt in and coat the kernels evenly.
Method 2: In the husk (soaked)
1. Soak the corn. Place the unshucked ears in a large bucket or pot of cold water for at least 15 minutes. Weigh them down with a plate if needed — the husks want to float. The soak saturates the outer layers so they steam rather than burn on the grill. Skipping the soak increases the risk of the husks flaring up or charring too quickly before the kernels are cooked through.
2. Trim the silk end. After soaking, fold back the outer husk layers just far enough to remove silk from the top inch or two of the ear. Removing this exposed silk prevents it from burning into an acrid char while cooking. Fold the husks back over and press them closed. Some cooks tie the end with a strip of soaked husk.
3. Grill over direct medium heat. Set the grill to medium heat (350–400°F). Place the ears directly on the grate. The outer husk layers will darken and char significantly — that is normal. The inner layers are still protecting the kernels and steaming them. Rotate every 4–5 minutes. Total time: 15–18 minutes.
4. Check for doneness. Gently peel back one husk layer at the fattest part of the ear and press a kernel with a fingernail. If it releases liquid and feels tender, the corn is done. If it feels starchy and firm, fold the husk back and return to the grill for 3 more minutes.
5. Rest and shuck at the table. Pull the ears off the grill and let them rest for 2 minutes. The husks retain heat effectively, so the corn stays hot for several minutes after leaving the grill. Shucking at the table adds a hands-on element that works well for casual cookouts. The husks are hot — use a towel or corn holder and warn guests accordingly.
Method 3: Foil-wrapped corn
1. Husk and season the corn. Remove all husks and silk from each ear. Lay each ear on a double layer of heavy-duty aluminum foil. Apply softened butter directly to the corn — about 1 tablespoon per ear — and add your choice of seasonings. Salt and cracked pepper is a solid baseline. Smoked paprika, garlic powder, and cotija cheese are excellent additions. See the seasoning section below for complete ideas.
2. Wrap tightly. Roll the foil around the corn with no gaps, then twist the ends like a candy wrapper to seal completely. Use two layers of foil for thicker coverage and to prevent tears during handling. The sealed packet traps the steam and fat inside, producing a very tender, moist result without any char.
3. Grill over direct medium heat. Grill at 350–400°F for 18–20 minutes, rotating the packet every 5 minutes. The foil distributes heat evenly around the entire cob, so the corn cooks uniformly.
4. Open carefully. Pull the foil packets off the grill and open them away from your face — the steam inside is extremely hot. The corn can be served in the foil packet itself or transferred to a plate for plating.
How long does it take to grill corn?
Timing depends on the method and grill temperature. Use these as reliable starting points, always confirming with a kernel test:
| Method | Temperature | Total Time | Turn Frequency |
|---|---|---|---|
| Husked (direct heat) | 400–450°F | 10–12 minutes | Every 3 minutes |
| In the husk (soaked) | 350–400°F | 15–18 minutes | Every 4–5 minutes |
| Foil-wrapped | 350–400°F | 18–20 minutes | Every 5 minutes |
| In the husk (dry, no soak) | 350°F | 20–25 minutes | Every 5–6 minutes |
Corn is done when: kernels are bright yellow (not pale starchy white), feel tender under light pressure, and release milky liquid when pierced. For husked corn, light charring on the high spots is the visual confirmation. Err toward slightly longer if you are unsure — overcooked corn loses a bit of sweetness and becomes soft, but it is far more forgiving than overcooked meat.
Seasoning and topping ideas for grilled corn
Plain grilled corn with salted butter is genuinely excellent. A few additional ingredients elevate it significantly. Add these after cooking for husked and in-husk methods; for foil-wrapped corn, add seasonings inside the packet before sealing.
Classic:
- Salted butter and freshly cracked black pepper
- Herb butter (softened butter mixed with garlic, chives, and flat-leaf parsley)
- Grated Parmesan, garlic, and a light drizzle of olive oil
Mexican street corn (elote): Brush with mayonnaise, roll in cotija cheese or crumbled feta, dust generously with chili powder, and squeeze fresh lime juice over the top. Add smoked paprika for depth. This preparation is arguably the best thing you can do with grilled corn — it takes about 3 minutes to assemble and turns a side dish into the centerpiece of the plate.
Smoky-spicy: Mix chipotle powder, smoked paprika, and fine sea salt into softened butter. Apply immediately off the grill while the kernels are still hot. The char on the husked kernels pairs perfectly with the chipotle heat.
Sweet glaze: Brush with honey butter (equal parts honey and softened butter) during the last 2 minutes over direct heat. The honey caramelizes quickly — watch it closely and do not walk away.
Corn seasoning blend on Amazon — dedicated corn seasoning blends combining sweet, smoky, and savory notes are widely available and take the guesswork out of building a balanced topping.
What mistakes ruin grilled corn?
Skipping the oil coat on husked corn. Dry kernels stick to the grate and tear when you try to turn the ear, pulling cooked kernels away from the cob. A light coat of high-smoke-point oil prevents this entirely.
Not soaking in-husk corn. Putting dry husk corn directly on a hot grill results in the outer layers catching fire or charring so heavily that the smoke flavor becomes harsh. The 15-minute soak takes almost no active effort and prevents this.
Grilling off-season corn. Summer corn picked that morning and grilled that afternoon is a completely different product from corn purchased out of season. The sugars in fresh sweet corn begin converting to starch within hours of harvest. Buying from a farmers market or farm stand at the peak of season makes an enormous difference in the final sweetness and flavor.
Adding butter before husked corn goes on the grill. Butter has a smoke point of 300–350°F and burns into a dark, bitter residue at the 400–450°F temperatures needed for char. Apply it after the corn comes off the grill, not before.
Overcrowding the grill. Each ear needs clearance for heat circulation and for you to turn it. Leave at least 1 inch of space between ears. Packing ears tightly together creates cold spots and uneven cooking.
FAQ
Frequently asked questions
Do you have to soak corn before grilling?
How do you know when grilled corn is done?
Can you grill corn without foil?
Can you grill frozen corn on the cob?
What temperature should the grill be for corn?
How far ahead can you prep corn for grilling?
Bottom line
For most cookouts, husked corn over direct medium-high heat for 10–12 minutes is the right move — it is fast, produces beautiful char marks, and delivers the roasted-sweet flavor that makes grilled corn a summer staple. Grill in the husk when cooking for a large crowd or when you want a more tender, steamed result. Choose foil-wrapped corn when you want to load each ear with butter and seasonings before it ever touches the grill. All three methods are reliable — pick the one that fits your timeline and texture preference.
For related reading: how to grill vegetables properly, how to grill a perfect steak, best grill thermometers for accurate readings, and how to clean a grill the right way.