guides
How to Cook Chicken on a Grill
Grill juicy chicken every time. Covers the best cuts, two-zone heat setup, step-by-step timing, safe temperatures, and the most common mistakes to avoid.
 Cole Whitaker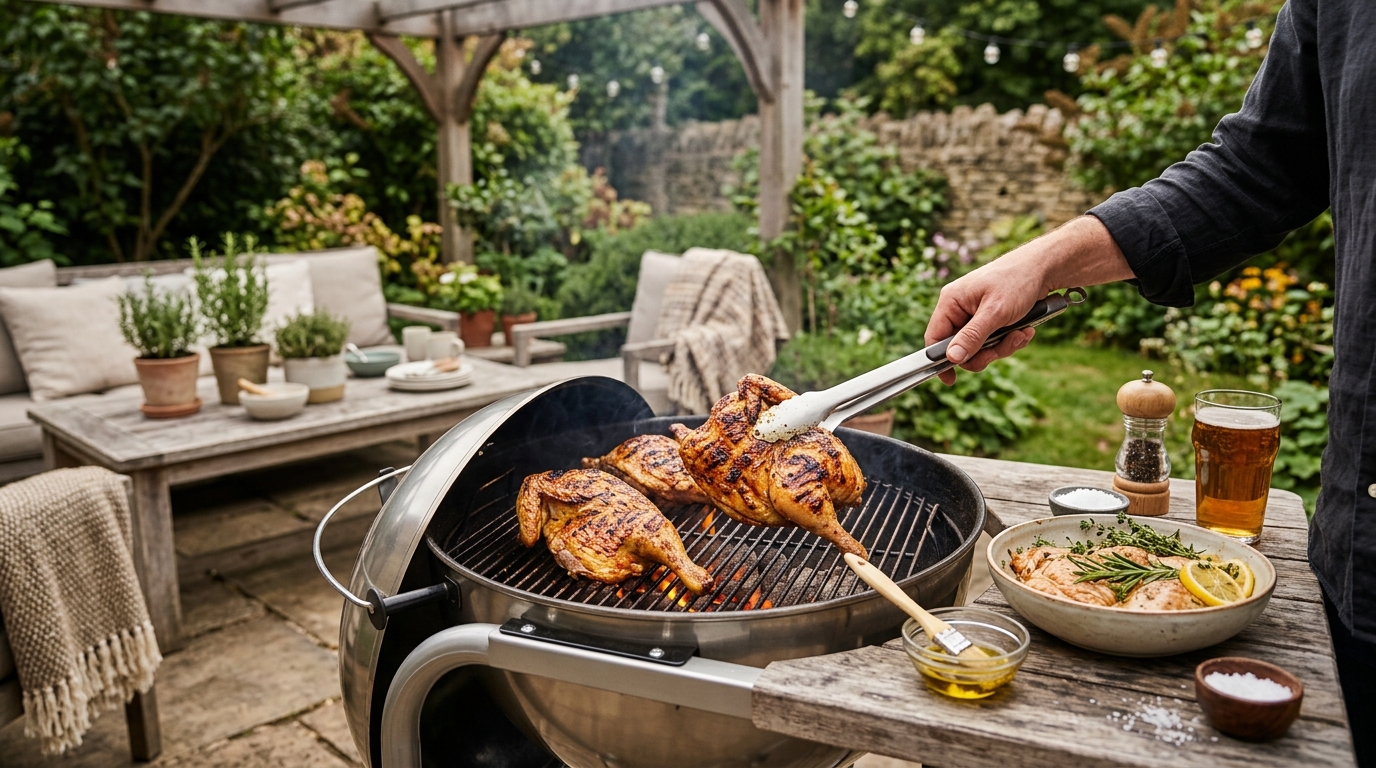
The key to juicy grilled chicken: dry-brine with kosher salt at least one hour ahead, build a two-zone fire (direct heat for browning, indirect heat to reach 165°F internal), and rest for five minutes before cutting. Bone-in thighs are the most forgiving cut; boneless breasts only stay moist if you pull them the moment the thermometer reads 160°F.
Which chicken cut is best for grilling?
Not all chicken cuts respond the same way to grill heat. Bone-in pieces take longer but are far more forgiving; boneless cuts cook fast but punish inattention. Here is how the main cuts compare:
| Product | Best for | Rating | Notes | |
|---|---|---|---|---|
| Bone-in, Skin-on Thighs | Beginners and all-around grilling | ★★★★★ | The highest fat content of any common cut means they stay moist even if you go a few degrees over target. Skin renders and crisps beautifully with the two-zone method. The single best cut to learn grilling on. | — |
| Drumsticks | Budget-friendly crowd cooking | ★★★★★ | Similar fat content to thighs and very hard to dry out. Take slightly longer due to denser meat around the bone. Great for marinades — the skin holds them well. A crowd favorite at cookouts. | — |
| Boneless, Skinless Breasts | Lean meals; requires close attention | ★★★★☆ | Very low fat and no bone or skin means they dry out fast. Must be grilled at medium heat (375°F) and pulled at exactly 160–162°F. Pounding to even thickness before grilling is strongly recommended. | — |
| Bone-in Split Breasts | Large servings with more moisture than boneless | ★★★★☆ | The bone and skin protect the meat and provide more margin for error than boneless breasts. Take 35 to 45 minutes total with the two-zone method. Ideal when you want white meat without constant temperature vigilance. | — |
| Wings | Crispy skin, direct heat simplicity | ★★★★★ | Small size means they cook entirely over direct heat at medium-high. No thermometer stress — the skin renders and crisps visually at around 10 to 12 minutes per side. Best cut for parties and appetizers. | — |
| Spatchcock Whole Chicken | Advanced cooks; deepest flavor | ★★★★☆ | Removing the backbone and flattening the bird creates even thickness for more uniform cooking. Takes 45 to 60 minutes total but produces the most impressive result. Use the two-zone method and a thermometer in the thigh. | — |
The takeaway: If you are new to grilling chicken, buy bone-in, skin-on thighs. They are cheap, widely available, and deliver the best results across the widest range of grill temperatures. Boneless breasts are harder to grill well — the window between perfectly cooked and dry is only about 10°F, and there is no skin or bone to act as a buffer.
What equipment do you need to grill chicken?
Chicken does not require specialized gear, but two items are genuinely non-negotiable:
Essential:
- An instant-read thermometer — the only reliable way to confirm chicken has reached 165°F without overcooking. A good thermometer reads in 2 to 3 seconds and pays for itself the first time it saves you from dry, overcooked breast. View instant-read thermometers on Amazon
- Long-handled tongs — for turning pieces without piercing the meat or getting close to direct flames. Never use a fork, which punctures the skin and lets juices escape during cooking.
Highly recommended:
- Wire grill brush or grill cleaning stone — clean grates prevent sticking and off-flavors from previous cooks
- Grill baskets for chicken pieces — keep small pieces like wings organized and simplify flipping without losing any into the fire
- BBQ gloves for heat protection — essential for adjusting vents or moving charcoal on a live fire
Optional but useful:
- Basting brush for applying sauces in the final minutes of cooking
- Spray bottle of water for flare-up control (fat dripping from chicken skin causes intense flares at high heat)
- Chimney starter if cooking over charcoal — the fastest and most consistent way to light a full bed of coals
How to cook chicken on a grill: step-by-step
Step 1: Choose your cut and check for uniformity. Start by selecting pieces of similar size and thickness. Uneven cuts take different amounts of time, making it nearly impossible to pull everything at the right moment. If you are using boneless breasts, pound them to an even thickness of about 3/4 inch using a meat mallet or heavy skillet before grilling. Bone-in pieces can go directly to the next step without modification.
Step 2: Dry-brine with salt. Pat all pieces thoroughly dry with paper towels. Wet surfaces prevent crisp skin from forming — the grill must evaporate surface moisture before any browning begins. Season generously with kosher salt on all surfaces, including under the skin of skin-on pieces. Use about 3/4 teaspoon of kosher salt per pound of chicken. Transfer to a wire rack set over a baking sheet and refrigerate uncovered for at least 1 hour, or up to 24 hours. The salt initially draws out moisture, which then dissolves back into the meat, seasoning deeper into the muscle fibers and leaving the surface drier for better crust formation.
Step 3: Build a two-zone fire. For gas grills: preheat all burners to high for 15 minutes, then reduce one side to medium-low. This creates a hot direct zone and a cooler indirect zone. For charcoal grills: light a full chimney of coals and wait until all coals are covered with grey ash, then bank them to one side, leaving the other half of the grill without coals. Target temperature over the direct zone: 375 to 400°F for chicken. This is lower than the 450 to 500°F used for steak — chicken fat drips and ignites easily, causing flare-ups that char the outside before the inside is done.
Step 4: Oil the grates and place chicken skin-side down over direct heat. Brush the preheated grates with a folded paper towel soaked in canola or vegetable oil, gripping it with long tongs. Place bone-in pieces skin-side down directly over the hot zone. For boneless breasts, place them flat over medium-high direct heat. Close the lid immediately.
Step 5: Sear over direct heat without moving. For bone-in, skin-on pieces (thighs, drumsticks, split breasts): cook skin-side down over direct heat for 5 to 8 minutes with the lid closed. The skin should be golden-brown and release cleanly from the grate before flipping. If it sticks, wait another minute — forcing it off tears the skin and leaves it on the grate. Flip once to skin-side up and cook an additional 3 to 5 minutes over direct heat.
For boneless breasts and wings: cook over direct medium-high heat for 5 to 7 minutes per side without moving to indirect. Boneless cuts are thin enough that they cook through over direct heat in 10 to 14 minutes total.
Step 6: Move bone-in pieces to indirect heat to finish. After both sides have developed color, transfer bone-in pieces to the cooler side of the grill. Close the lid and let the ambient heat bring the internal temperature up slowly. For thighs and drumsticks, this indirect phase takes 15 to 25 minutes. For split breasts, it takes 25 to 35 minutes. Avoid lifting the lid frequently — each time you open it, you lose 15 to 25°F of ambient heat and extend the total cook time.
Step 7: Apply sauce in the final minutes (if using). If you want glazed chicken, brush on BBQ sauce during the last 3 to 5 minutes over indirect heat only, then move back to direct heat for 60 to 90 seconds per side to caramelize the glaze. Do not apply sugary sauces earlier — the sugars in BBQ sauce burn quickly at grill temperatures and will char the exterior before the interior is done. Season only with salt and pepper during the cook; add sauce at the very end.
Step 8: Check the temperature and pull at 160–162°F. Insert an instant-read thermometer into the thickest part of each piece, avoiding the bone (bone reads hotter than the surrounding meat and gives a false high reading). Pull chicken when the thickest point reads 160 to 162°F. Carryover cooking during the rest brings it to the safe 165°F target. Pulling at exactly 165°F means the meat is already slightly past ideal.
Step 9: Rest before serving. Remove all pieces to a cutting board or platter and tent loosely with foil. Rest for at least 5 minutes before cutting. The rest period allows muscle fibers that tightened under heat to relax, redistributing the juices back through the meat rather than pouring out the moment you cut. Cutting immediately after pulling means losing much of the moisture you worked to preserve.
Should you marinate or dry-brine chicken?
Both approaches work, but they accomplish different things.
Dry-brining — salting the exterior and refrigerating uncovered — is superior for skin-on pieces. It draws out surface moisture, seasons deeply into the meat, and leaves the skin dry enough to render and crisp on the grill. The result is better skin texture and more evenly seasoned meat throughout.
Wet marinating works well for boneless, skinless pieces that have no skin to protect or crisp. Acids in the marinade (citrus juice, vinegar, buttermilk) begin to denature the surface proteins, helping with tenderness in leaner cuts. However, a wet marinade leaves the surface moist, which slows browning and makes crispiness much harder to achieve. For skin-on pieces, wet marinades can soften and steam the skin during grilling, preventing it from rendering properly.
The recommendation: Dry-brine skin-on pieces; marinate boneless skinless pieces for up to four hours if you want that flavor profile. Do not marinate for more than four hours — extended exposure to acidic marinades makes the surface of the meat mushy and soft rather than firm.
How long does it take to grill chicken?
Use these as starting points and always confirm doneness with a thermometer:
Direct heat only:
- Boneless, skinless breasts (3/4-inch thick): 5–7 minutes per side (10–14 minutes total)
- Wings: 10–12 minutes per side (20–24 minutes total)
- Boneless thighs: 5–7 minutes per side (10–14 minutes total)
Two-zone method (direct sear + indirect finish):
- Bone-in, skin-on thighs: 8 minutes direct + 15–25 minutes indirect (25–35 minutes total)
- Drumsticks: 8 minutes direct + 20–25 minutes indirect (30–35 minutes total)
- Bone-in split breasts: 8 minutes direct + 25–35 minutes indirect (35–45 minutes total)
- Spatchcock whole chicken: 10 minutes direct + 35–45 minutes indirect (45–55 minutes total)
Grill output, ambient temperature, and the starting temperature of the chicken all affect timing. Chicken pulled directly from the refrigerator takes 5 to 10 extra minutes compared to chicken rested at room temperature for 30 minutes before grilling.
What temperature should grilled chicken reach?
The USDA safe minimum for all poultry is 165°F internal temperature, measured with a calibrated thermometer in the thickest part of the meat, not touching bone.
In practice, pull chicken when it reads 160–162°F and rest it for five minutes — carryover cooking during the rest brings it to 165°F without continuing to cook on the grill. Pulling at exactly 165°F means the meat was already slightly overdone before it left the heat.
For chicken thighs and drumsticks specifically, there is no penalty for going slightly higher. The collagen in dark meat begins converting to gelatin around 170°F, which actually makes thighs more tender and juicy at 170 to 175°F than at 165°F. This is not true for breasts and wings, which dry out noticeably above 165°F.
What mistakes dry out grilled chicken?
Grilling over high direct heat the entire time. Unlike steak, chicken has skin that burns and fat that ignites flares at very high temperatures. Full direct heat throughout produces charred skin with a dry interior. Two-zone cooking solves this by separating the browning phase from the finishing phase.
Not drying the surface before grilling. Wet chicken surfaces steam rather than sear, delaying browning and preventing crisp skin from forming. Pat everything dry before applying salt, and let the dry brine work for at least an hour before the chicken goes on the grill.
Applying sauce too early. BBQ sauce contains significant sugar that burns at grill temperatures. Applied early, it chars the skin black while leaving the interior undercooked. Apply sauce only in the last 3 to 5 minutes of cooking and caramelize briefly over direct heat.
Cutting into the chicken immediately. Like any protein, chicken loses a significant portion of its moisture on cutting if not rested first. Five minutes of resting is mandatory — the fibers relax and reabsorb the juices that contracted under heat.
Using only visual cues for doneness. Chicken juices often run clear before the meat reaches 165°F internally, and color varies with marinade, brine, or smoke exposure. A thermometer is the only reliable doneness check for poultry — visual inspection alone is not sufficient.
Overcrowding the grill. Pieces placed too close together trap steam between them, preventing proper browning on the sides. Leave at least 1 inch of space between pieces and resist the urge to cram the grill. Cook in batches if needed — the results are worth the extra time.
FAQ
Frequently asked questions
Do you grill chicken on direct or indirect heat?
How do you keep chicken moist on the grill?
What temperature should the grill be for chicken?
How do you know when grilled chicken is done?
Should you flip chicken on the grill?
Can you grill chicken from frozen?
Bottom line
Grilling great chicken comes down to three fundamentals: start with bone-in, skin-on thighs or drumsticks for the most forgiving results, dry-brine with kosher salt at least one hour ahead, and build a two-zone fire that lets you sear over direct heat and finish gently over indirect. A reliable instant-read thermometer is the single most important tool in the process — pulling at 160 to 162°F and resting for five minutes produces juicy, safe chicken every time. Master those three steps and you have the foundation for every cut and recipe on the grill.
For related reading: how to grill a perfect steak, direct vs indirect grilling explained, best instant-read thermometers for grilling, and how to clean a grill after every cook.