guides
How to Grill a Whole Chicken
Learn to grill a whole chicken perfectly using the spatchcock method. Hit 165°F in the thigh, rest 10 minutes, and serve juicy results every time.
 Cole Whitaker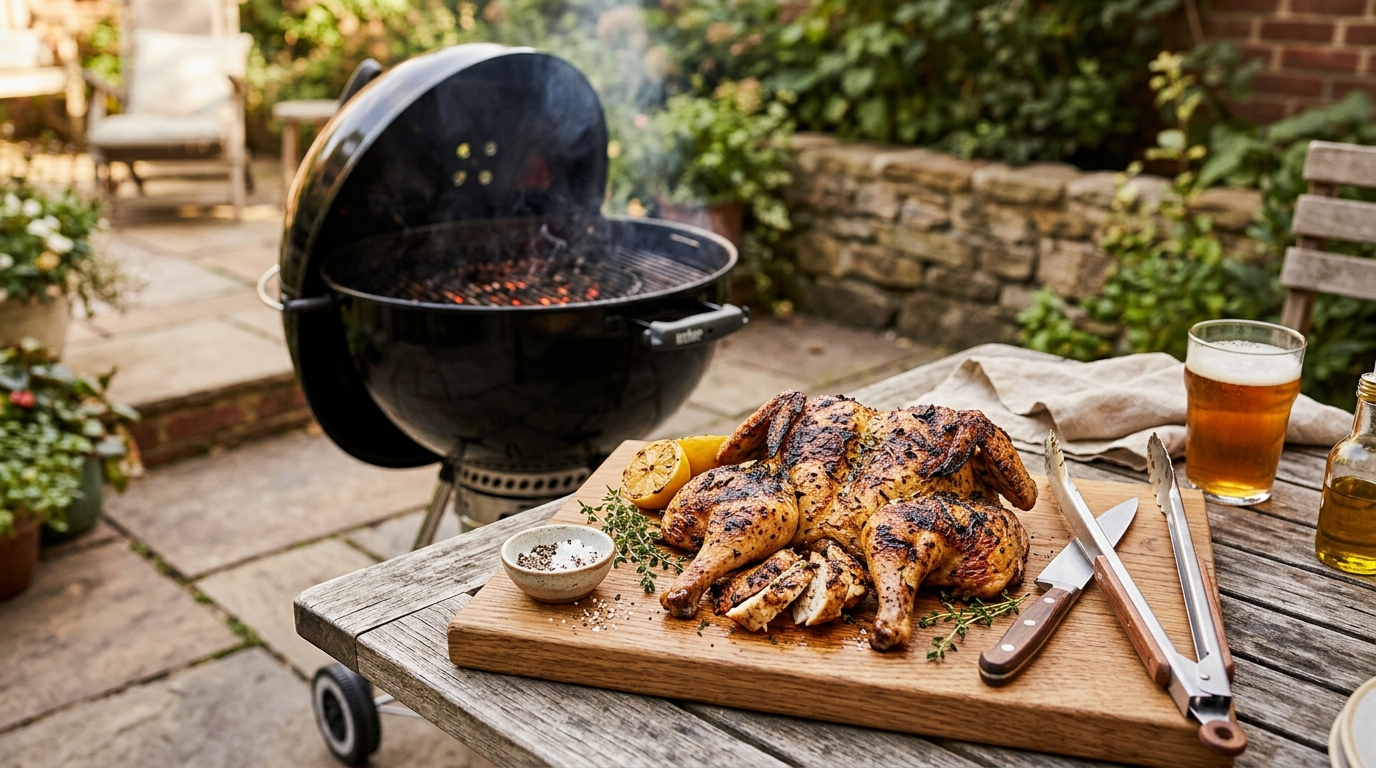
The best way to grill a whole chicken is to spatchcock it first — remove the backbone, flatten the bird, and cook over two-zone heat at 375–400°F for 45–55 minutes. This method cuts cook time by a third, cooks the breast and thigh simultaneously, and delivers 165°F throughout without the dried-out breast meat that plagues upright or unflattened birds.
Which whole chicken grilling method works best?
There are three common approaches to grilling a whole chicken. Spatchcocking is the hands-down winner for most backyard cooks — faster, more even, crispier skin. The other two have specific use cases but more trade-offs.
| Product | Best for | Rating | Notes | |
|---|---|---|---|---|
| Spatchcock (flattened) | Even cooking, crispy skin, fastest cook time | ★★★★★ | Remove the backbone with kitchen shears and press flat. The breast and thigh reach 165°F at nearly the same time. Skin makes full grill contact for maximum crispiness. Best choice for most cooks. | — |
| Beer can or upright roaster | Dramatic presentation, moist interior | ★★★★☆ | Prop the bird upright on a can or vertical roaster. Striking presentation but uneven cooking — the breast often dries out before the thigh is done. The steam-from-the-can effect is scientifically minimal. | — |
| Whole bird unstuffed | Traditional appearance only | ★★★☆☆ | The most difficult to cook evenly. The cavity traps air and slows thigh cooking while the breast overcooks. Requires constant monitoring and probe placement in multiple locations. | — |
Why spatchcocking wins: When a whole bird is flattened, the breast and thigh are at nearly the same distance from the heat source and finish at nearly the same time. Without flattening, the thigh — which needs 165°F — sits much further from the grill surface than the breast, which is done at 160°F. The result in an unspatchcocked bird is almost always overcooked breast meat by the time the thigh is safe.
What size chicken should you buy?
Whole chickens sold in most grocery stores range from 3 to 6 pounds. For grilling, the sweet spot is 3.5 to 4.5 pounds.
- Under 3.5 lbs: Cooks fast, but the ratio of skin to meat is high and there is less margin for error. Breasts can dry out quickly even over indirect heat.
- 3.5 to 4.5 lbs: The ideal range for most gas and charcoal grills. Cooks through in 45–55 minutes when spatchcocked. Plenty of meat for four servings.
- Over 5 lbs: Takes significantly longer, increases the risk of charring the outside before the thigh reaches temperature, and may not lie flat on smaller grill grates.
Buy air-chilled chicken when available — it contains less retained water than standard water-chilled supermarket chicken, which means drier skin going into the grill and better crisping results. Standard water-chilled chicken works fine but may take a few extra minutes for skin moisture to cook off.
What equipment do you need?
The tool list is short. Kitchen shears and a thermometer are non-negotiable; everything else is helpful but optional.
Essential:
- Kitchen shears — to remove the backbone for spatchcocking. A sharp pair cuts cleanly through poultry bone in under two minutes. Kitchen shears for spatchcocking on Amazon
- Instant-read thermometer — the only reliable way to verify 165°F in the thigh without guesswork. Pull the bird at 160°F and let carry-over cooking finish during the rest. Instant-read thermometers on Amazon — the Thermoworks Thermapen MK4 is the benchmark; the ThermoPop is the best budget alternative under $35.
- Grill with a lid — required for indirect heat. Any covered gas or charcoal grill works.
Helpful:
- Wire rack and sheet pan for the dry-brine rest in the refrigerator
- Basting brush for butter or glaze applications during the final minutes
- Long-handled tongs for safely moving the bird
How to grill a whole chicken: step-by-step
Step 1: Spatchcock the chicken. Place the chicken breast-side down on a cutting board. Use kitchen shears to cut along one side of the backbone from the tail to the neck, then repeat on the other side. Remove the backbone entirely — save it for stock. Flip the bird breast-side up and press firmly on the breastbone until you feel it crack and the bird lies flat. The two legs should splay out to the sides.
If the keel bone (the prominent cartilage ridge in the center of the breast) is preventing the bird from lying completely flat, use a paring knife to score along either side of it and press harder. The finished bird should be uniform in thickness from breast center to thigh.
Step 2: Dry-brine the chicken. Pat the skin completely dry with paper towels. Apply kosher salt generously: about 1 teaspoon per pound of bird, distributed evenly across the breast, thighs, and drumsticks — do not forget the underside. Place the chicken skin-side up on a wire rack over a sheet pan and refrigerate uncovered for at least 4 hours, and up to 24 hours overnight.
This step is not optional if you want crispy skin. The salt draws surface moisture out, then pulls it back in to season the meat deeply, and the uncovered refrigeration dries the skin further. The difference between a 4-hour brine and an overnight brine is visible — the overnight bird crisps noticeably faster and more evenly.
If time is short, salt the bird at room temperature for 45 minutes before grilling. The skin will not be as crisp, but the interior will still be seasoned.
Step 3: Season with a dry rub (optional). Just before grilling, apply a dry rub if desired. A simple mixture works well: 1 tablespoon smoked paprika, 1 teaspoon garlic powder, 1 teaspoon onion powder, 1 teaspoon black pepper, and half a teaspoon of cayenne. Rub it onto the skin and underside. Alternatively, brush the skin with melted butter or neutral oil to promote browning. Avoid sugary rubs — they burn at grill temperatures and char the skin before the thigh is fully cooked.
Step 4: Set up two-zone heat. For gas grills: light burners on one side to medium-high (target 375–400°F at the grill lid). Leave the other side off entirely.
For charcoal grills: light a full chimney of charcoal and bank it to one side of the grill once the coals are fully ashed over. You have direct heat on one side and no coals on the other. Two or three chunks of fruit wood — apple or cherry — placed on top of the coals add a mild smoke that complements chicken without overpowering it.
Two zones are essential. The indirect zone cooks the thick thigh through at a controlled rate without burning the skin during the longer cook time.
Step 5: Grill over indirect heat first. Place the chicken skin-side up on the indirect zone (the side with no heat source below). Close the lid and maintain 375–400°F. Cook for 35–40 minutes without lifting the lid. The indirect phase cooks the thigh and breast through without any direct flame contact.
During this phase the skin will not crisp much — that happens in the next step.
Step 6: Finish skin-side down over direct heat. At the 35-minute mark, check the internal temperature in the thickest part of the thigh without touching bone. If it reads 150°F or higher, the bird is ready for the final sear. Flip the chicken skin-side down and move it over the direct heat zone. Close the lid and cook for 5–8 minutes, until the skin is deep golden-brown and crispy.
Check the thigh temperature again: pull the chicken when it reads 160°F. It will carry over to 165°F during the rest.
If the thigh reads below 145°F at the 35-minute mark, continue indirect cooking for another 8–10 minutes before moving to direct heat.
Step 7: Rest before carving. Transfer the chicken to a cutting board and rest uncovered for 10 minutes. Resting is especially important for whole birds because the breast is more susceptible to drying out if carved immediately. The internal temperature will rise to 165°F during the rest, and the juices will redistribute through the meat.
Do not tent with foil during the rest — trapped steam softens the skin you worked to crisp.
Step 8: Carve and serve. Start by removing the leg quarters: cut through the skin between the thigh and breast, push the leg outward until the hip joint pops, then cut through the joint. Repeat on the other side. Remove the wings. Slice the breast meat parallel to the breastbone. A spatchcocked bird is easy to carve because the entire breast side is flat and fully accessible.
What internal temperature is a whole grilled chicken done?
The USDA minimum for whole poultry is 165°F. Check in the thickest part of the thigh without touching bone — the thigh is always the last part of the bird to reach temperature.
| Location | Safe temperature |
|---|---|
| Thigh (thickest part, no bone contact) | 165°F |
| Breast (thickest part) | 165°F |
| Drumstick | 165°F |
| Wing | 165°F |
The breast naturally finishes faster than the thigh. In a properly spatchcocked bird the difference at the 35-minute mark is typically 5–10°F — breast at 150–155°F while the thigh reads 140–150°F. Continue cooking until the thigh hits 160°F and let the rest bring it to 165°F, or cook directly to 165°F if you plan to carve immediately.
Note on pink meat near the bone: Pink coloration near the joint does not indicate undercooking in poultry. It is a chemical reaction from bone marrow gases. Use the thermometer reading, not the color, to determine doneness.
How long does it take to grill a whole chicken?
A spatchcocked 3.5 to 4.5 lb chicken at 375–400°F takes 45 to 55 minutes total on most covered gas or charcoal grills: 35–40 minutes over indirect heat, then 5–10 minutes skin-side down over direct heat.
Factors that add time:
- Bird pulled straight from the refrigerator vs. tempered at room temperature for 30 minutes (+5 to 8 minutes)
- Wind reducing ambient grill temperature (+5 to 10 minutes)
- Bird over 5 lbs (+15 to 20 minutes)
Always verify with a thermometer — never rely on time alone.
What mistakes ruin a grilled whole chicken?
Skipping the dry-brine. Wet skin from water-chilled supermarket chicken does not crisp well. The surface moisture must evaporate before browning begins, which wastes your heat window. Salt the bird and refrigerate uncovered for at least 4 hours.
Not spatchcocking. A round, unflattened bird has dramatically uneven cooking geometry. The thigh can lag 20–30°F behind the breast, forcing you to overcook the breast to get the thigh safe. Spatchcocking takes 90 seconds with kitchen shears and solves the entire problem.
Starting skin-side down. Placing the skin directly over direct heat first for a large bird risks charring the exterior before the thigh is done. Start skin-side up over indirect heat, then flip for the final crisping pass.
Using too high a temperature. Steak-level heat (450–500°F) causes the skin to char before the thigh reaches 165°F. Whole birds need medium heat (375–400°F) in the indirect phase. Reserve extreme temperatures for thin steaks and quick cooks.
Cutting immediately. Carry-over cooking continues for 10 minutes off the grill. Cutting at 160°F and resting delivers more moisture than cutting the instant it hits 165°F — the resting period allows juice to redistribute back into the muscle fibers.
FAQ
Frequently asked questions
What temperature should the grill be for a whole chicken?
How do you keep a whole chicken from drying out on the grill?
Can you grill a whole chicken without spatchcocking?
Do you flip a spatchcock chicken on the grill?
Should you wet brine or dry-brine a whole chicken before grilling?
What wood chips pair best with grilled chicken?
Bottom line
Grilling a whole chicken comes down to two decisions: spatchcock the bird and use two-zone heat. Spatchcocking eliminates the fundamental problem of whole-chicken grilling — the breast and thigh finishing at completely different times. Two-zone heat lets you cook the thigh through gently before a final direct-heat crisping pass. Add a dry-brine overnight and a fast-read thermometer, and the result consistently beats grocery-store rotisserie chicken.
For related reading: how to grill a perfect steak, how to light a charcoal grill for two-zone cooking, best instant-read thermometers for poultry, and how to use a smoker for low-and-slow cooks.