guides
How to Light a Charcoal Grill
The fastest and cleanest methods to light a charcoal grill — chimney starter, electric coil, and fire cubes — with step-by-step instructions for each.
 Cole Whitaker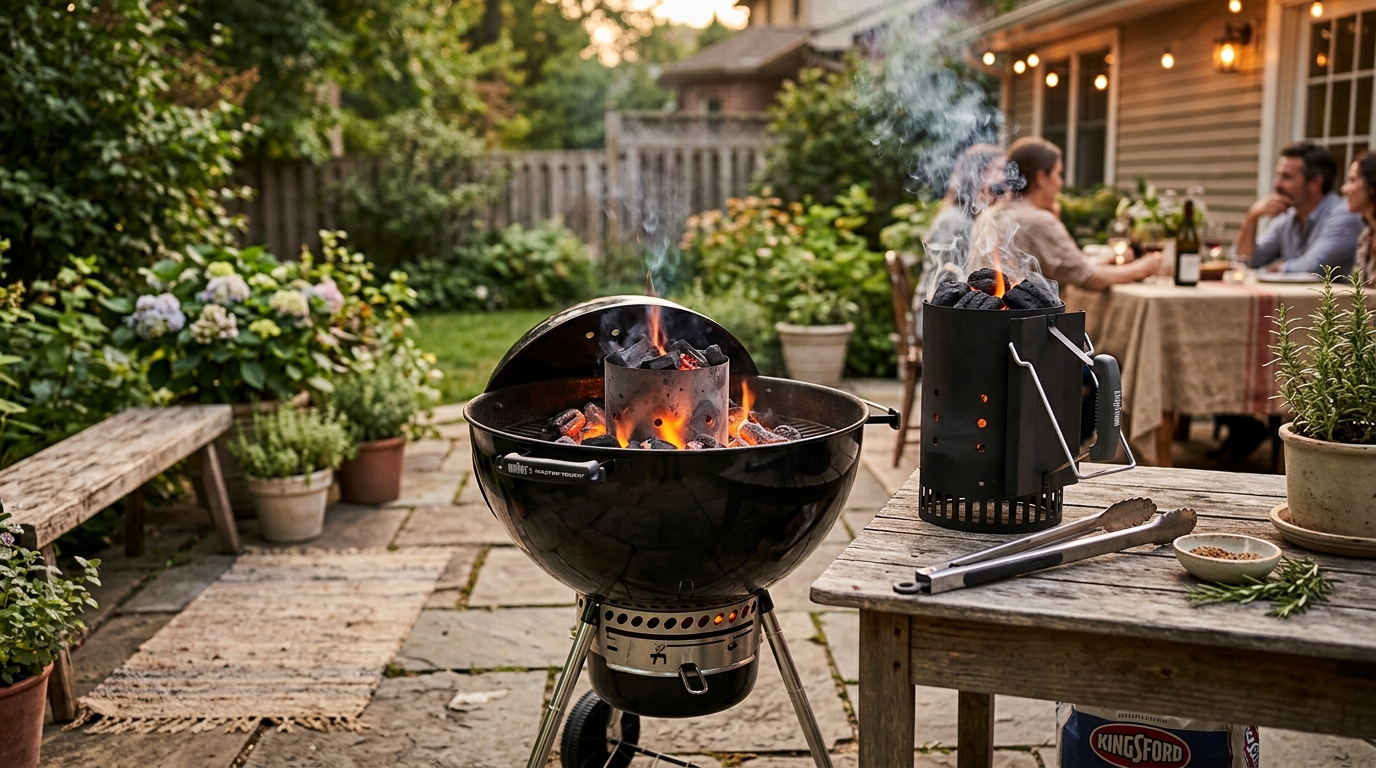
The best way to light a charcoal grill is with a chimney starter: stuff the lower chamber with newspaper or a fire cube, fill the top with charcoal, and light from below. In 15 to 20 minutes the coals are ash-covered and ready — no lighter fluid, no chemical aftertaste, and no guessing about how much accelerant to use. Every other method is a reasonable workaround; the chimney starter is simply the right tool.
What you need to light a charcoal grill
You do not need much gear. The tool you choose makes most of the difference.
Essential:
- A chimney starter (or your chosen alternative — see the comparison below)
- Charcoal — briquettes or lump
- An ignition source: long-reach lighter, long matches, or a fire starting cube
Helpful but optional:
- Heat-resistant BBQ gloves for handling a hot chimney
- Fire starting cubes or compressed wood-wool starters — cleaner and more wind-resistant than newspaper
- A clip-on grill thermometer to confirm temperature before cooking
A top-rated chimney starter: search on Amazon
Heat-resistant BBQ gloves: search on Amazon
Method 1: Chimney Starter (recommended)
A chimney starter is a metal cylinder with a lower chamber for paper or fire starters and an upper chamber for charcoal. The design creates a convection draft — heat rises through the column, drawing fresh air in from the bottom — that lights charcoal evenly and quickly without any chemicals. It costs under $20, lasts indefinitely, and will change how you think about charcoal lighting.
The Weber Rapid Fire Chimney Starter is the benchmark and costs around $15 to $20: see it on Amazon
Step-by-step: lighting with a chimney starter
-
Open the bottom vent fully. Good airflow is what turns a lit coal pile into a usable fire. Before you do anything else, open the bottom vent on your grill completely.
-
Load the lower chamber. Crumple 2 sheets of newspaper into loose balls and stuff them into the lower chamber of the chimney. Alternatively, place one fire starting cube — it burns for 10 to 12 minutes and is far less affected by wind than newspaper.
-
Fill the top with charcoal. Pour charcoal into the upper chamber. A full standard chimney holds roughly 100 briquettes or an equivalent volume of lump charcoal. Use a half chimney for short cooks or smaller grills; use a full chimney for high-heat cooking like steaks or burgers.
-
Set the chimney on the grill grate. Place the chimney directly on the charcoal grate (not the cooking grate) — this keeps it stable and allows airflow from all sides. You can also set it on a concrete patio surface.
-
Light from the bottom. Hold a long-reach lighter through the lower vents of the chimney and ignite the newspaper or fire cube. Light in two or three spots around the base for even ignition.
-
Wait for the coals to ash over. After 15 to 20 minutes, the top layer of coals will begin showing grey ash. When roughly 80% of the surface is ashy and you can see orange glow at the edges, the coals are ready. You should hear a light crackling.
-
Pour the coals and cook. Using heat-resistant gloves, grasp the handle firmly and pour the coals where you want them. Spread evenly for direct heat, or bank to one side for a two-zone setup. Replace the cooking grate, let it heat for 2 minutes, and cook.
Important: The chimney body gets extremely hot during the 15 to 20 minute wait. Always set it on a fireproof surface when not actively handled, and use gloves when pouring. Never set a used chimney on grass, wood, or any surface that can char or melt.
Method 2: Electric Charcoal Starter
An electric starter is a metal heating coil that ignites charcoal through direct contact. There is no open flame at any point. Plug it in, nestle the coil into a coal pile, and leave it for 8 to 12 minutes. It is the best option when wind makes paper blowing around a problem, or when you want a completely flameless process.
Electric charcoal starters on Amazon: search here
Step-by-step: lighting with an electric starter
- Build a mound of charcoal in the grill with a small depression in the center.
- Nestle the metal coil into the depression, making direct contact with as many coals as possible.
- Plug the starter into an outlet. The coil glows red almost immediately.
- After 8 to 10 minutes, the coals in contact with the element will be glowing. Gently wiggle the starter free from the pile.
- Unplug the starter and set it on a fireproof surface — the coil stays dangerously hot for 10 or more minutes after unplugging.
- Leave the grill uncovered with the bottom vent fully open. Let the fire spread through the pile for another 10 to 15 minutes before cooking.
The main limitation is proximity to a power outlet — this method is not practical at a remote cookout or campsite.
Method 3: Lighter Fluid
Lighter fluid is the most widely available method and the one most people learned first. It works, but it requires patience. The most common mistake is cooking too soon before the fluid has fully burned off, which leaves a petrochemical taste in the food.
Step-by-step: lighting with lighter fluid
- Stack charcoal in a pyramid. Build a cone shape in the center of the grill — this concentrates heat and improves ignition.
- Apply lighter fluid. Squirt fluid over the charcoal in a sweeping motion, covering the surfaces evenly. Use about 1/4 cup for a standard load — do not drench the coals.
- Wait 1 to 2 minutes. Let the fluid soak slightly into the coal surface. Lighting immediately after applying creates a large flare of burning fluid rather than burning coal.
- Light from a safe distance. Use a long-reach lighter at the base of the pyramid in two or three spots. Step back — the initial flare-up is substantial.
- Wait the full 15 to 20 minutes. Do not place food on the grill until every coal shows grey ash and no lighter fluid flame is visible. The chemical smell must be completely gone before you cook.
Critical safety rule: Never add lighter fluid to coals that are already hot, glowing, or burning. The liquid ignites instantly on contact with heat, and the flame travels up the stream to the container in your hand. All lighter fluid must be applied before the initial lighting only.
Method 4: Natural Fire Starters
Natural fire starting cubes — compressed wood wool, paraffin, or wax-based starters — are a clean middle ground. They create a sustained flame without petroleum chemicals, handle wind well, and leave no taste in the food. They are slightly slower than a chimney but require no separate container.
Natural fire starting cubes on Amazon: search here
Step-by-step: lighting with fire cubes
- Place one or two fire cubes on the charcoal grate in the center of the grill.
- Stack charcoal around and over the cubes in a loose pyramid, leaving the top of a cube or one corner exposed.
- Light the exposed portion with a match or lighter.
- Leave the grill lid off with the bottom vent fully open.
- Wait 20 to 25 minutes for the coals to ash over before cooking.
Comparing the methods
| Product | Best for | Rating | Notes | |
|---|---|---|---|---|
| Chimney Starter | Most home grillers — best all-around method | ★★★★★ | Fastest and most consistent. Ready in 15 to 20 minutes. No chemicals, no taste. One-time cost under $20. Works everywhere. | — |
| Electric Starter | Flameless lighting near a power outlet | ★★★★☆ | No consumables, no open flame. Requires electricity. Coil stays hot after use. Adds 10 to 15 minutes vs a chimney. | — |
| Natural Fire Cubes | No lighter fluid and no extra gear | ★★★★☆ | Clean and wind-resistant. No chemical taste. Slower than a chimney at 20 to 25 minutes. Ongoing cost for cubes. | — |
| Lighter Fluid | No extra equipment, widely available | ★★★☆☆ | Works reliably with patience. Chemical taste risk if coals are not fully ashed. Safety risk if added to hot coals. | — |
How to arrange charcoal after lighting
Where you place the lit coals determines how you cook. Three arrangements cover almost every situation.
Direct heat (entire grate covered): Pour coals evenly across the full charcoal grate. Every part of the cooking surface is a hot zone. Best for thin, fast-cooking foods — burgers, hot dogs, boneless chicken thighs, corn, and vegetables — that cook in under 10 minutes.
Two-zone setup (coals on one side only): Pour all the coals to cover one half of the grate, leaving the other half empty. The coal side is your sear zone; the empty side is the indirect zone. This is the most versatile setup for real-world cooking: sear over the hot side, then slide food to the cooler side to finish without charring. Use this for thick steaks, bone-in chicken pieces, and sausages.
Snake method (low and slow): Arrange unlit briquettes in a single-layer curved line along the outer edge of the charcoal grate. Light 10 to 12 briquettes in a chimney, then pour those lit coals at one end of the snake. The fire travels slowly down the line over 4 to 6 hours, holding a consistent temperature of 225 to 275°F without adding more coals. Ideal for ribs, brisket, or pork shoulder.
Getting your grill to temperature
Once coals are arranged, put the lid on with the top vent fully open and wait 5 to 10 minutes for the grill to preheat. Then check the temperature.
Target ranges for common cooking:
- High heat (450 to 550°F): Steaks, burgers, thin boneless chicken — direct heat
- Medium heat (350 to 450°F): Bone-in chicken, sausages, vegetables, fish — direct or two-zone
- Low and slow (225 to 275°F): Ribs, brisket, pork shoulder — indirect, vents partially closed
Vent control is the charcoal throttle. The bottom vent regulates oxygen supply to the fire; the top vent controls exhaust. Both fully open means maximum heat. Partially closing the bottom vent slows airflow and drops temperature — close it 50% to fall from 500°F toward 350°F. Never fully close either vent while coals are active; the smoldering produces acrid smoke that ruins flavor.
A clip-on grill thermometer for reading temperature at grate level: search on Amazon
Troubleshooting charcoal lighting problems
The charcoal will not stay lit. Airflow is almost always the cause. Confirm the bottom vent is fully open. Ash accumulation from past cooks blocks the vent opening — scrape it clear before you start. Damp charcoal (from humid storage) also resists staying lit; always store charcoal in a sealed bag or airtight container.
The coals light but die out quickly. Wind is the most common culprit when lighting in an open chimney or loose pile. The chimney starter handles wind far better than an uncovered pile. Inside the grill, a very thin coal layer or insufficient coal stacking can starve the fire; use at least a half chimney worth of coals even for small cooks.
Heavy black smoke during or after lighting. Thick grey-white smoke at the start is normal — it clears as the fire fully establishes. Persistent heavy black smoke usually means fat or grease dripping onto the coals from food. Move the food to the indirect zone immediately and open the lid briefly to let the flare subside.
The grill will not reach high enough temperature. Most likely: not enough charcoal. A full chimney in a standard 22-inch kettle produces roughly 500°F with vents open. Half a chimney tops out around 350°F. Also check that the ash catcher and bottom vents are clear of packed ash from previous sessions — a clogged vent chokes airflow more than people expect.
Lighter fluid smell on cooked food. The coals were not fully ashed over before cooking began. Next time, wait the complete 20 minutes until coals are uniformly grey with no yellow flame and no chemical odor remaining. The smell dissipates entirely — if you can still detect it, wait longer.
FAQ
Frequently asked questions
How long does it take to light a charcoal grill?
Can I light charcoal without lighter fluid?
How do I know when the charcoal is ready to cook on?
Why does my charcoal keep going out after lighting?
How much charcoal should I use?
Is lump charcoal or briquettes better for lighting?
Bottom line
The chimney starter wins every comparison — speed, consistency, food quality, and safety. It costs under $20, works every time, and eliminates the trial and error that comes with lighter fluid. Use newspaper or a single fire cube at the bottom, fill the top with charcoal, light it once, and pour ready coals in 15 to 20 minutes. For a completely flameless option, an electric coil starter is the next best choice with a power outlet nearby. Lighter fluid is a workable fallback — just commit to waiting the full 20 minutes before any food touches the grill.
For related reading: how to grill a perfect steak once your coals are ready, how to clean your grill after every cook, the best charcoal grills at every price point, and charcoal vs. pellet vs. gas — which fuel type is right for you?.