guides
How to Reverse Sear a Steak
The reverse sear produces a more even cook and better crust than direct grilling. Step-by-step guide with oven and grill methods, temperatures, and cuts.
 Cole Whitaker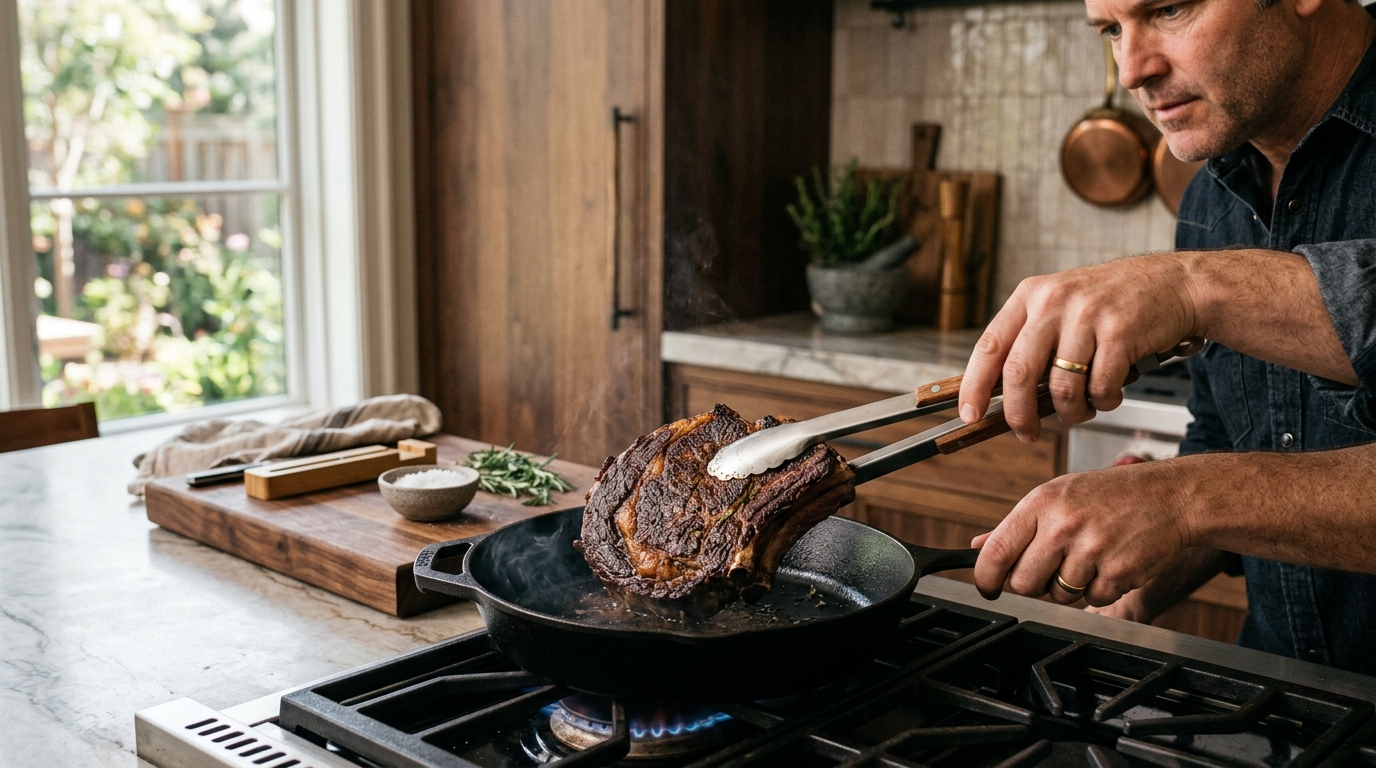
The reverse sear method: slow heat first (250–275°F) until the steak is 15°F below your target, then a 90-second blast in a screaming-hot pan or over direct grill heat to build the crust. The result is a thinner grey band, a drier surface that sears faster, and a much wider margin for error than traditional sear-first grilling.
What is the reverse sear method?
Traditional steak cooking sears first over high heat, then finishes over lower heat to reach the target temperature. The reverse sear flips that sequence: low heat first until the steak is nearly done, then high heat at the end to build the crust.
The logic is based on what happens to moisture during cooking. In a conventional sear-first method, the exterior browns quickly but the interior continues cooking at an uncontrolled rate during the finishing phase, producing a wide grey ring of overcooked meat between the crust and the pink center. In the reverse sear, the low-heat phase cooks the steak edge-to-edge to near target temperature with almost no grey band — then the 90-second final sear creates the crust and adds only minimal additional internal heat.
The other advantage is surface dryness. As the steak slowly comes up to temperature in the oven, surface moisture evaporates. By the time it goes into the screaming-hot pan, the exterior is already dry, which means the Maillard reaction starts immediately rather than waiting for moisture to evaporate first. This produces a deeper, darker crust in less time.
Why does the reverse sear beat conventional grilling?
Direct comparison between sear-first and reverse-sear on the same cut reveals three consistent advantages:
Thinner grey ring. With a 1.5-inch ribeye cooked sear-first, the grey band of overcooked meat between the crust and the pink center typically extends 6–8mm inward from each side. With the reverse sear method on the same steak, that band shrinks to under 3mm. The slow-heat phase brings the entire cross-section to a nearly uniform temperature before the crust-forming step.
Better crust in less time. Because the low-heat phase dries the steak surface, the final high-heat sear spends no time evaporating moisture — all the energy goes directly into browning. A 90-second sear in a 600°F cast iron pan after a reverse sear is darker and more complex than a 3-minute sear on a wet steak fresh from the refrigerator.
More forgiving timing. The steak holds at 115–120°F during the rest period with minimal carry-over from the low-heat environment. This gives you a 5- to 10-minute window to set up the searing pan, prep sides, or finish a sauce — the steak will not overcook the way it would sitting off a high-heat finish.
Which cuts are best for the reverse sear?
The reverse sear technique benefits thick cuts most. For steaks under 1 inch, the total advantage is minimal — the steak heats through too fast for the low-heat phase to make a meaningful difference. The sweet spot is 1.5 inches and above.
| Product | Best for | Rating | Notes | |
|---|---|---|---|---|
| Ribeye (1.5 inch+) | Best all-around for reverse sear | ★★★★★ | High marbling bastes the meat during the low-heat phase. The fat cap renders further during the final sear. Produces the most complex crust and interior of any reverse-sear cut. | — |
| New York Strip (1.5 inch+) | Clean beefy flavor, holds shape well | ★★★★★ | Leaner than ribeye but still forgiving. The firmer texture holds up to the long low-heat phase without losing structural integrity. Excellent at medium-rare. | — |
| Tomahawk (2 inch+) | Showstopper presentation, very thick cut | ★★★★★ | Almost requires the reverse sear — at 2 inches thick it is nearly impossible to cook evenly by other methods. The long bone adds visual impact at the table. | — |
| Bone-in Porterhouse (1.5 inch+) | Strip and tenderloin in one cut | ★★★★☆ | The bone creates a slight heat barrier. The reverse sear manages both sides of the bone more evenly than high-heat methods, reducing the risk of overcooking the thinner tenderloin. | — |
| Filet Mignon (1.5 inch+) | Most tender cut, least fat | ★★★★☆ | Very low fat content. The narrow doneness window for filet is much easier to hit when approaching temperature slowly. Do not exceed medium or it dries out completely. | — |
What about thinner cuts? For steaks under 1.25 inches, a two-zone direct grill method or a very hot cast iron sear delivers nearly identical results with a fraction of the total cook time. The reverse sear earns its extra time investment with thick, expensive cuts where getting the doneness right truly matters.
What equipment do you need?
Essential:
- A wire rack set over a rimmed baking sheet — elevates the steak in the oven so hot air circulates on all sides
- An oven or covered grill capable of holding a steady 250–275°F
- An instant-read thermometer — a fast-read model (2–3 seconds) is critical for catching the pull temperature accurately
For the final sear:
- A cast iron skillet — the highest heat-retention surface available for a fast sear at home; pre-heat it on the stovetop for 4–5 minutes over high heat before the steak goes in
- Alternatively: the hottest zone of a charcoal or gas grill, aiming for 600°F+ on the grate surface
- High-smoke-point oil — avocado oil, refined vegetable oil, or rendered beef tallow
Recommended gear:
Best for Catching the precise pull temperature during the low-heat phase
Thermoworks ThermoPop 2 Instant-Read Thermometer
Reads in 2–3 seconds with a rotating backlit display and 1-degree accuracy. The reverse sear method requires catching a precise pull temperature — a slow thermometer causes overshooting. The ThermoPop is the standard budget-category recommendation for serious home cooks.
★★★★★ 4.8 · 12,400 reviews
Check current price on Amazon→Best for Final sear after the reverse sear low-heat phase
Lodge 12-Inch Cast Iron Skillet
Cast iron retains heat better than stainless or non-stick, so it does not cool significantly when the steak hits the surface. A 12-inch Lodge pre-heated for 4 minutes on high puts a deep crust on a ribeye in 60–90 seconds per side. Pre-seasoned and ready from day one.
★★★★★ 4.7 · 28,600 reviews
Check current price on Amazon→How to reverse sear a steak: step-by-step
Step 1: Choose and prep the steak. Select a cut at least 1.5 inches thick. Pat completely dry with paper towels — surface moisture is the enemy of both the low-heat phase and the final sear. Season generously with kosher salt (about 1 teaspoon per pound) and black pepper on both sides and all edges. Place on a wire rack set over a baking sheet. For best results, refrigerate uncovered for 1 to 24 hours after seasoning — the surface dries further and the interior seasons more deeply. Remove from the refrigerator and rest at room temperature for 30 minutes before cooking.
Step 2: Preheat the oven to 250–275°F. Set the rack in the center of the oven. Lower temperatures produce a more even cook — anything between 200°F and 300°F works. At 250°F, a 1.5-inch ribeye takes approximately 25–40 minutes to reach the pull temperature. At 275°F, expect 20–30 minutes.
Step 3: Cook to 10–15°F below target. Place the rack-and-sheet in the oven and insert a leave-in probe thermometer if you have one, or check with an instant-read every 10 minutes after the first 20 minutes. Pull temperatures by target doneness:
| Target Doneness | Pull from oven at |
|---|---|
| Rare (125°F final) | 110°F |
| Medium-rare (130–135°F final) | 115–120°F |
| Medium (140–145°F final) | 125–130°F |
| Medium-well (150°F final) | 135–140°F |
For medium-rare — the recommended target for ribeye and strip — pull the steak when it reads 115–120°F.
Step 4: Rest the steak while the searing surface heats. Remove the steak from the oven and set aside. Place the cast iron skillet on a burner over maximum heat for 4–5 minutes. Add 1 tablespoon of avocado or vegetable oil — it should smoke immediately on contact. If using a grill for the sear, open all vents and preheat with all burners on high for 10 minutes while the steak rests.
The steak will not overcook while resting. Carry-over from a 250°F oven is minimal, and the internal temperature will hold or rise only 2–5°F during the 5–10 minutes it takes to prep the searing surface.
Step 5: Sear for 60–90 seconds per side. Place the steak in the smoking-hot pan. Press it flat gently with a spatula to maximize surface contact. Do not move it. After 60–90 seconds, check for a deep brown crust — it should be dark mahogany, not golden. Flip once and sear the second side for 45–60 seconds. The second side sears faster because the steak is now hot all the way through.
Step 6: Sear the edges. Using tongs, hold the steak on each edge for 15–20 seconds to render the fat cap and build crust on the sides. This step is often skipped but makes a visible difference on a thick ribeye or strip with a prominent fat cap.
Step 7: Add a butter baste (optional). After flipping, add a tablespoon of butter, a crushed garlic clove, and a sprig of thyme to the pan. Tilt the pan and use a spoon to baste the steak continuously for the remaining sear time. This adds a rich, aromatic layer to the crust without meaningfully extending cook time.
Step 8: Rest briefly and slice. Rest the steak for 3–5 minutes before cutting. The reverse sear requires a shorter post-sear rest than conventional methods because the low-heat phase has already allowed the muscle fibers to relax. The final sear adds only a brief burst of surface heat, so the interior does not need as much recovery time as a steak cooked hot throughout.
How to reverse sear on a grill without an oven
The oven is the most consistent tool for the low-heat phase, but a covered charcoal kettle or gas grill works equally well.
Charcoal grill method: Light a half-chimney of charcoal and bank it entirely to one side. Place the steak on the opposite side of the grate, well away from the coals. Close the lid, keep all vents open 25–50% to hold 250–275°F, and cook until the steak hits the pull temperature. Then slide the steak directly over the coals for the final sear.
Gas grill method: Turn one burner to high and leave the other burners off. Place the steak over the unlit burners. Close the lid and adjust the lit burner to maintain 250–275°F at grate level. Once the steak hits the pull temperature, move it directly over the lit burner — which will be at maximum heat — for the 60–90 second final sear.
The main challenge on a grill is temperature consistency. The lid thermometer reads dome temperature, which can differ 25–50°F from grate level. Check the steak more frequently in the final 10 minutes of the low-heat phase to catch the pull temperature accurately.
When not to use the reverse sear
The reverse sear is not automatically the right method for every steak situation.
Use the reverse sear when: the steak is 1.5 inches or thicker; you want maximum edge-to-edge evenness on an expensive cut; you are cooking for guests and want a forgiving method with a wider timing window; or you are working with a tenderloin or other low-fat cut where overcooking is catastrophic.
Use traditional high-heat grilling when: the steak is under 1.25 inches — the reverse sear adds time without meaningful benefit at this thickness; you need dinner on the table in 15 minutes; you are cooking skirt, flank, or other thin cuts that require high heat only; or you want the authentic char-smoke flavor from cooking directly over hot coals throughout.
The two methods solve different problems. A 1.5-inch ribeye benefits enormously from the reverse sear. A 0.75-inch skirt steak does not.
What mistakes ruin a reverse sear?
Skipping the dry-surface step. Surface moisture must evaporate before the Maillard reaction can begin. Pat the steak dry before the oven phase and the surface will be even drier by the time it hits the pan. Surface moisture left on the steak results in a pale, steamed crust rather than a dark, complex sear.
Pulling from the oven too late. The most common error is waiting until the steak is at the final target temperature before the sear. The sear adds 5–10°F of internal heat even in 90 seconds. Pull from the oven at least 10–15°F below your final target — not 5°F.
An insufficiently hot sear surface. A lukewarm cast iron pan steams the steak instead of searing it. Pre-heat the pan for 4–5 minutes on maximum heat — it should be smoking visibly before the steak goes in. A proper sear at 600°F takes under 90 seconds and produces a dark, textured crust. A 400°F pan requires 3–4 minutes per side and produces a grey, soft exterior.
Skipping the edge sear. The sides and fat cap are often left pale after the reverse sear. Holding the steak upright on each edge for 15–20 seconds in the hot pan renders the fat and finishes the crust all the way around.
FAQ
Frequently asked questions
How long does the reverse sear method take total?
Can you reverse sear a frozen steak?
Do you need a cast iron pan for the final sear?
What oven temperature is best for the reverse sear?
Should you rest the steak after the reverse sear?
Does the reverse sear work for pork chops?
Bottom line
The reverse sear is the most reliable method for cooking a thick steak to a precise doneness with maximum edge-to-edge evenness. The low-heat phase handles the bulk of the cook with no risk of a wide grey band, and the 90-second final sear on pre-heated cast iron builds a deeper crust faster than any other technique available to a home cook. For ribeyes, strips, and tomahawks at 1.5 inches or more, it is worth the extra time every time.
For related reading: how to grill a perfect steak on direct heat, best instant-read thermometers for precise pull temperatures, brisket smoking guide for low-and-slow cooks, and gas vs charcoal grill: which suits your cooking style.