guides
How to Clean a Pellet Grill: Step-by-Step Guide
Step-by-step guide to cleaning your pellet grill — firepot, drip tray, grates, and hopper. Keep your pellet smoker running efficiently.
 Cole Whitaker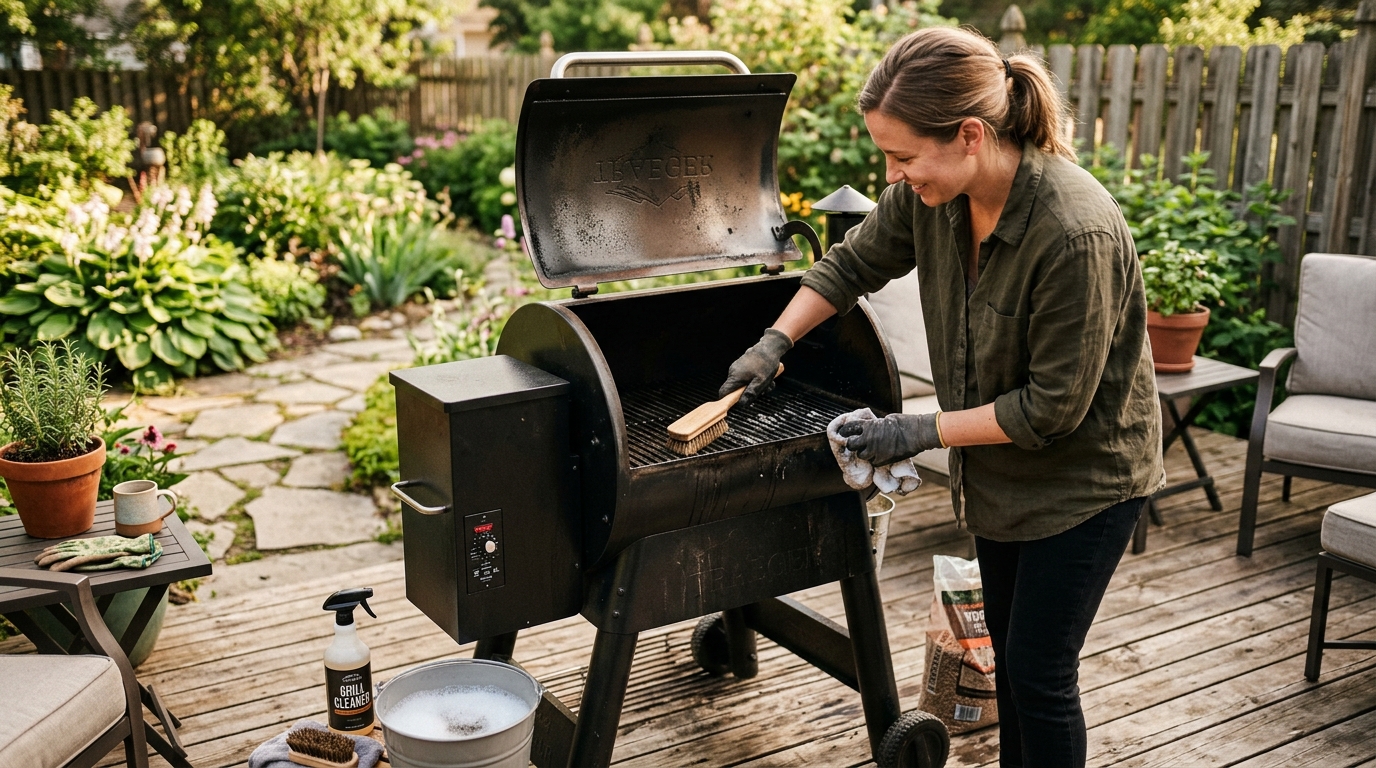
Clean your pellet grill every 3–5 cooks: vacuum the firepot, wipe the drip tray and grease bucket, and brush the grates. Every 50 hours of cook time — or once per season — do a full deep clean covering the barrel interior, heat baffle, and hopper. Skipping routine maintenance causes grease fires, erratic temperature swings, and auger jams.
Why cleaning a pellet grill matters more than you think
Pellet grills are nearly set-and-forget during a cook, which leads many owners to put off cleaning far longer than they should. The consequences are more serious than with a gas or charcoal grill.
Temperature swings and ignition failures. The firepot — the small metal cup where pellets burn — accumulates ash with every cook. Once ash builds up past a certain depth, the hot rod igniter cannot heat incoming pellets efficiently. You get longer pre-heat times, inconsistent temperatures, and eventually failed startups that leave you with a cold grill full of unburned pellets. Vacuuming the firepot is the single highest-leverage maintenance step for pellet grills.
Grease fires. The drip tray and grease bucket collect rendered fat from every cook. On a long brisket session, this can add up to a full cup or more of hot grease. If the drip tray overflows — or if accumulated grease reaches a flash point — the resulting grease fire can damage the drip pan, the barrel interior, and in severe cases the controller unit. Pellet grill grease fires are common and entirely preventable.
Auger jams and motor strain. Dust from degraded or low-quality pellets settles in the hopper and auger tube. In humid climates, moisture causes pellets to swell and clump. Both conditions jam the auger — the mechanical screw that feeds pellets to the firepot — which either stops the cook mid-session or burns out the auger motor. Keeping the hopper clean and using quality pellets from dry storage prevents this.
Flavor contamination. Old grease coating the barrel interior and heat baffle goes rancid over time. On the next cook, that residue reactivates from heat and transfers off-flavors to whatever is on the grate. This is particularly noticeable on delicate proteins like fish or chicken breasts.
What you need to clean a pellet grill
Most pellet grill cleaning requires only basic supplies. The one specialized item worth buying if you cook more than once a week is an ash vacuum.
Essential tools:
- Shop vac with a fine ash filter, or a dedicated pellet grill ash vacuum
- Soft bristle or nylon grill brush (not stiff wire on porcelain-coated grates)
- Putty knife or flat scraper for baked-on grease
- Paper towels and disposable rags
- Metal bucket for grease disposal
Helpful but optional:
- Disposable drip tray liners (sized to your specific grill model)
- Disposable foil grease bucket liners
- Cooking oil in a spray bottle for re-seasoning grates after cleaning
What to avoid inside the barrel:
- Soap and water — strips the polymerized grease layer that protects the metal
- Wire brushes on porcelain-coated grates — the coating chips, exposing the steel below to rust
- Pressure washers — forces water into the controller housing, electronics, and welds
A purpose-built pellet grill ash vacuum: search on Amazon
Drip tray liners for popular pellet grill brands: search on Amazon
Routine cleaning: after every 3–5 cooks
This process takes 15–20 minutes once you have done it a few times. Build it into the session shutdown routine.
Step 1: Let the grill cool completely. Turn off the grill and allow it to reach ambient temperature before cleaning. Use the proper shutdown cycle — never hard-power the unit mid-cook, as this leaves unburned pellets in the firepot. Wait at least one hour after the shutdown cycle completes.
Step 2: Remove the cooking grates. Lift out the cooking grates and set them aside. On most pellet grills, grates are designed to stack or hang nearby, giving you full access to the heat baffle and drip pan below.
Step 3: Remove the heat baffle and drip tray. The heat baffle (also called the heat deflector or diffuser plate) sits directly above the firepot. It shields food from direct heat and channels dripping grease toward the drip tray. Lift it out — most are held in place by gravity with no fasteners. Below it, pull out the drip tray.
Step 4: Vacuum the firepot. Use the shop vac or ash vacuum to remove all ash from the firepot. The firepot has small holes along its sides and bottom for air circulation — these clog with fine ash and restrict airflow. The nozzle should fit directly into the cup. Some models have a removable firepot; if yours does, lift it out for easier vacuuming.
Step 5: Vacuum the barrel floor. With the heat baffle and drip tray removed, use the vacuum to remove ash and debris from the barrel floor. Pellet fragments, ash, and grease particulate collect here. Follow with a dry paper towel wipe of the barrel interior walls — dry only, never wet.
Step 6: Scrape and wipe the heat baffle. The baffle accumulates baked-on grease on its underside. Scrape with a putty knife while the residue is still pliable from residual warmth, then wipe with a dry paper towel. For heavy buildup, scraping is more effective than trying to dissolve it.
Step 7: Empty and wipe the drip tray. Pour any grease into a metal can or dedicated grease disposal container. Scrape the tray with a putty knife. If you use disposable liners, swap the old liner for a new one — this reduces tray cleaning to a 30-second task. For a bare metal tray, wipe with a dry paper towel after scraping.
Step 8: Empty the grease bucket. The grease bucket hanging off the side of most pellet grills collects overflow from the drip tray. Disposable foil bucket liners are available for most brands and make cleanup trivial. Without liners, wipe the bucket after each use to prevent grease from congealing and creating overflow risk.
Step 9: Clean the grill grates. Brush the grates with a nylon or stainless-bundle grill brush while they retain some residual warmth. For baked-on residue, a brief soak in warm water followed by scrubbing works well. Dry cast iron grates immediately and apply a thin oil coat to prevent rust.
Step 10: Reassemble and run a short cycle. Replace the drip tray, heat baffle, and grates. Run the grill on the pre-heat cycle for 5–10 minutes before the next cook. This confirms everything is seated correctly and burns off any residue before food goes on.
How often should you clean each component?
| Product | Best for | Rating | Notes | |
|---|---|---|---|---|
| Firepot (ash removal) | Ignition reliability and temperature stability | ★★★★★ | Every 3–5 cooks, or whenever pre-heat time increases noticeably. The single most critical cleaning task on a pellet grill. | — |
| Grease drip tray | Grease fire prevention | ★★★★★ | After every long cook of 2 or more hours. Quick wipe after shorter sessions. Disposable liners cut cleanup dramatically. | — |
| Grease bucket | Overflow prevention and fire safety | ★★★★★ | Every 2–3 cooks. A full bucket overflows onto the ground or ignites. Foil bucket liners make turnover fast. | — |
| Cooking grates | Flavor and food contact surface hygiene | ★★★★★ | Brush while warm after every cook. Soak and scrub monthly for deeper cleaning on stubborn buildup. | — |
| Heat baffle | Even heat distribution across the barrel | ★★★★☆ | Scrape and wipe every 5–8 cooks. Heavy carbon buildup causes hot spots and uneven cooking across the grate. | — |
| Barrel interior and hopper | Corrosion prevention and auger reliability | ★★★★☆ | Full deep clean once per season or every 50 hours of cook time. More often in humid climates. | — |
Full deep clean: once per season or every 50 hours
Budget 45–90 minutes for the full deep clean. Do it before winter storage, after winter storage before the first spring cook, or mid-season if you cook frequently.
Step 1: Complete all routine cleaning steps first. Run through the full routine cleaning process before starting the deep clean. Routine steps handle the accessible components; the deep clean addresses everything else.
Step 2: Inspect and clean the burn pot area thoroughly. With the vacuum, clean around the firepot housing — the barrel floor area surrounding the burn pot. Ash filters into gaps and crevices around the mount. Use a dry brush to loosen compacted ash before vacuuming.
Step 3: Clean the barrel walls. Use a plastic scraper or putty knife to remove any loose, flaking carbon from the barrel walls and lid interior. Do not use water or cleaner — dry scraping and a paper towel wipe only. Some carbon coating on the walls is normal; only remove material that is loose enough to fall onto food.
Step 4: Inspect and clean the temperature probes. Most pellet grills have one or two RTD (resistance temperature detector) probes inside the barrel. These probes get coated in grease and smoke residue, causing inaccurate temperature readings. Clean the probe tip by wiping with a cloth barely dampened with water — just damp, not soaked — then dry immediately. Compare the grill readout against a calibrated instant-read thermometer to verify accuracy.
Step 5: Clean the exterior. Wipe the exterior with warm soapy water and a cloth. For stainless steel surfaces, use a stainless cleaner and wipe with the grain. Clean the control panel with a barely damp cloth and avoid getting moisture into buttons or ports.
Step 6: Inspect the auger and hopper. Remove remaining pellets from the hopper using a shop vac. Check for clumped or swollen pellets — a sign of moisture infiltration. Inspect the auger tube through the hopper opening for pellet dust, fines, or jams. For a jammed auger, consult your brand’s manual; most require removing a rear panel to access the auger motor.
Step 7: Re-season the cooking surface. After deep cleaning, the grates and interior have less protective coating. Apply a thin coat of cooking oil to the grates using a folded paper towel. Run the grill at 350°F for 30–40 minutes to bake the oil in. This re-seasons the grates and barrel interior and prevents rust during storage.
Best tool for the job: pellet grill ash vacuum
A standard shop vac works, but the fine ash from burned pellets is extremely light and powdery. Without a proper ash filter, the vac blows ash right back into the air. A unit with a HEPA or dedicated ash filter keeps the firepot contents contained.
Best for Firepot and barrel floor ash removal
Ash Vacuum for Pellet Grills
A purpose-built ash vac with a fine-particle filter keeps ash out of the air and off your patio. The narrow nozzle fits directly into the firepot. If you cook on a pellet grill more than once a week, this pays for itself in 20 minutes of easier cleaning.
★★★★★ 4.7 · 1,340 reviews
Check current price on Amazon→Storing a pellet grill between seasons
End-of-season storage requires a few extra steps beyond the standard deep clean:
- Empty the hopper completely. Pellets left in a hopper over winter absorb moisture, swell, and jam the auger when you restart in spring. Use a shop vac to remove remaining pellets and pellet dust.
- Complete the full deep clean described above, including barrel interior, heat baffle, drip tray, and grease bucket.
- Re-season all cooking surfaces with a thin oil coat and a final burn-in cycle at 350°F.
- Cover the grill. Use a fitted cover designed for your specific model. A cover keeps moisture off the exterior, lid seal, and stack damper. Generic covers that allow wind to force moisture underneath are worse than no cover at all.
- Store in a sheltered location if possible. A garage or covered patio dramatically extends grill life compared to full outdoor exposure through winter.
Troubleshooting: common problems and cleaning fixes
Temperature runs 20–30°F below setpoint. Usually caused by ash buildup in the firepot restricting airflow to the hot rod. Vacuum the firepot thoroughly. Also check the RTD probe — a grease-coated probe reads low. Clean the probe tip and compare against a calibrated thermometer.
Grill fails to ignite after startup. Either the firepot is packed with ash from the previous cook (the hot rod cannot reach the pellets) or the pellets in the hopper are wet and swollen (the auger cannot push them to the firepot). Vacuum the firepot, inspect the hopper pellets, and retry.
Heavy smoke at startup, acrid smell. This indicates a grease fire in the drip tray or barrel. Turn the grill off immediately and leave the lid closed. Once the grease fire burns out and the grill is completely cool, clean the drip tray and barrel interior before the next use.
Auger makes grinding noise or stops mid-cook. Pellet dust or clumped pellets are jamming the auger. Turn off the grill immediately. Empty the hopper. Access the auger tube per your brand’s service instructions. Clear the jam and inspect the hopper for moisture.
Food tastes bitter or off. Rancid grease on the heat baffle or barrel walls is the usual culprit. A thorough deep clean — particularly scraping the heat baffle underside and wiping the barrel interior — resolves this within one to two subsequent cooks.
FAQ
Frequently asked questions
How often should I clean my pellet grill?
Can I use water to clean the inside of my pellet grill?
How do I clean the temperature probe on my pellet grill?
What happens if I do not clean the firepot?
Is it safe to leave pellets in the hopper between cooks?
How do I prevent grease fires in my pellet grill?
Bottom line
Pellet grill maintenance comes down to one core habit and one periodic effort. The core habit: after every few cooks, vacuum the firepot and check the grease bucket and drip tray — 15 minutes that eliminates the majority of pellet grill problems, including ignition failures, temperature fluctuations, grease fires, and off-flavors. The periodic effort: a full deep clean every 50 hours of cook time, covering the barrel interior, heat baffle, temperature probes, and hopper. A consistently maintained pellet grill delivers reliable temperatures, accurate probe readings, and food that tastes like the wood smoke from the pellets — not rancid grease from the last dozen cooks.
For related reading: our top pellet grill picks at every price, pellet grill vs. smoker: how they actually compare, the best grill cleaning tools for any grill type, or how to clean a gas or charcoal grill.